
Restoration of a 1983 vintage Commodore VIC20
My first computer gets back to life again
Disassembly
Retr0bright
Repairing plastic hinges
Cleaning the keyboard and the S-Video modification
Reassembly
Conclusion
Bibliography
Introduction
It is rather difficult to realise that there has been a time where computers were not part of the life of most people. At the beginning of 1980's, it was however clear that things are changing and that computers were becoming more and more important even for non-specialists. My mother, who at that time was a math and science teacher in a middle school, was aware of that: in 1985, she bought a second-hand Commodore VIC20 from a colleague. The computer is the one visible in figure 1 and came with the datassette, a rudimentary storage device to store programs and games. I recall that the colleague and friend who sold us the machine came to show us a little demo with a disk drive. That was a very impressive piece of hardware we could not afford, an expensive and professional expansion.
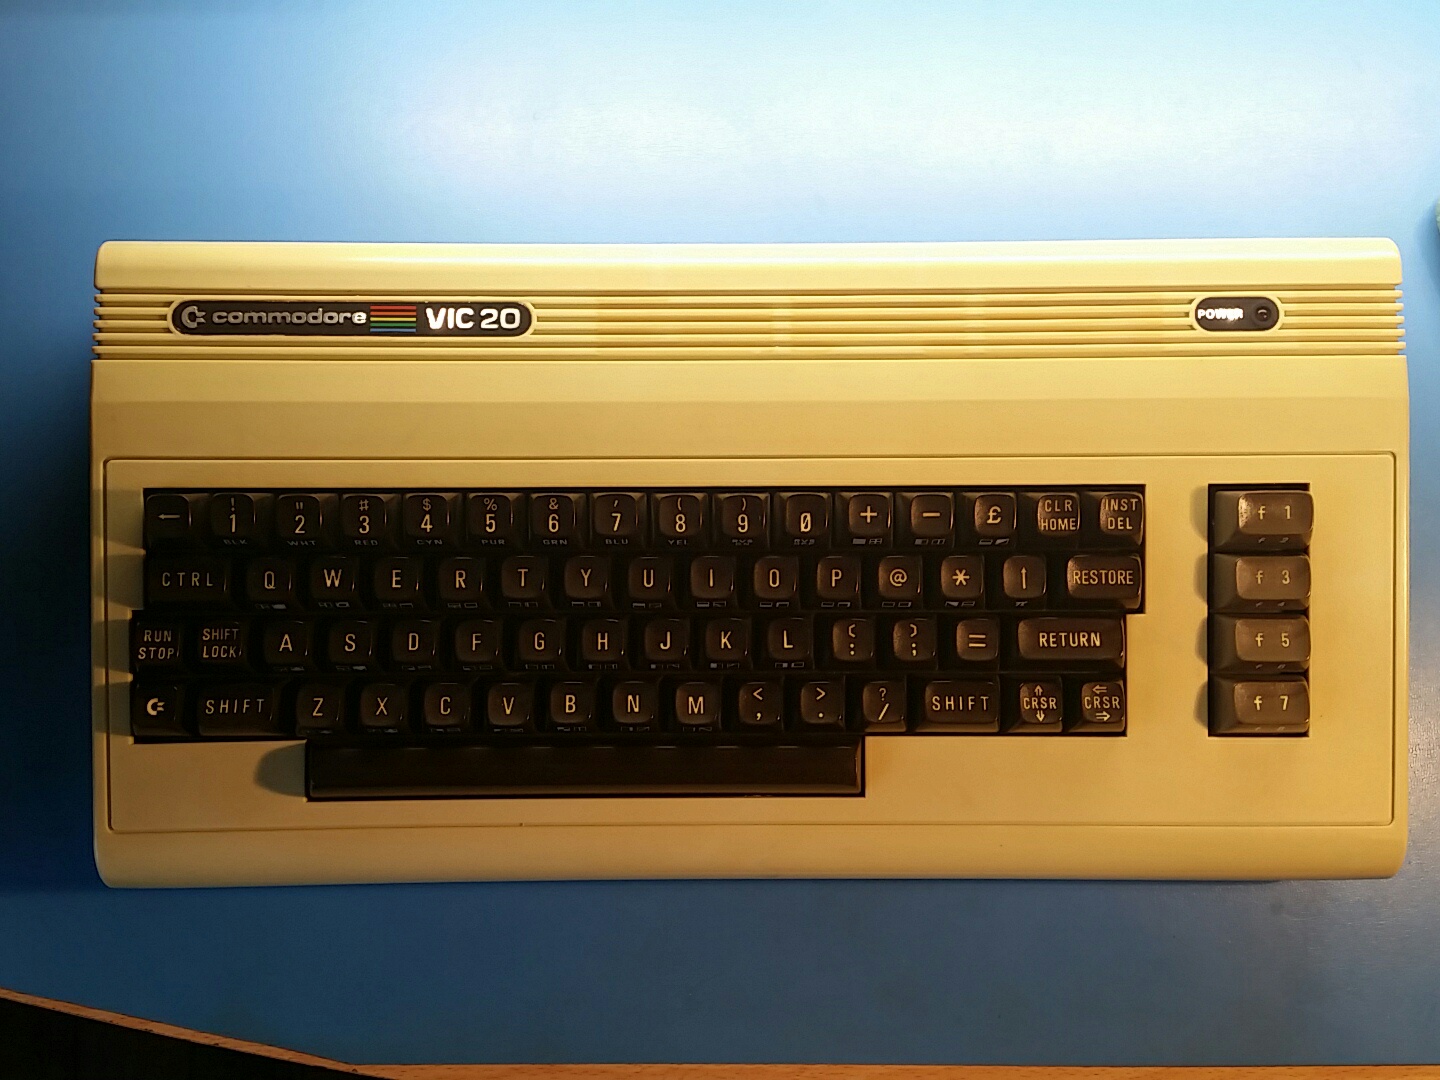
Fig.1: A nice Commodore VIC20, very yellow. My first computer. The yellowing come from the ageing of the plastic (ABS) which makes up the case
My mother's intention was to use that small computer in her classroom, connecting it to the television in the "video room" of the school. She did that several times, demonstrating to her students a few lines of BASIC. I think that this modest VIC has been the first computer that much of those students saw in their lives.
In 1985 I was 6 years old and I barely was able to read and write, yet I have been immediately under the charm. My father wrote LOAD and RUN inside the manual cover so that I could find the keys to push to load a game from the datassette and play it.
My little computer has been the first companion of my very first steps in computer science, from 1985 to 1991, with its games and the ease of use of its much limited BASIC. I never forgot it completely and, in Christmas' vacations of 2016, I picked it up again to play with it after a few years stored in a cardboard box (very well repaired from dust and heat, by the way).
As shown in figure 1, my VIC20 is in a rather nice condition aesthetically, but it is very yellowed. That colour is a very well-known defect that plagues a lot of objects made in a certain type of clear plastic (called ABS) built in 1980's. Moreover, even if the computer could be easily used with a monochrome monitor with the composite output, the image quality was not very good and I could not connect it easily to a modern LCD television at my mother's house. For those reasons, I decided to spend a bit of time trying to restore that computer and to offer it a new youth.
In this article, I will describe the restoration of this small Commodore VIC20. In particular, I will start by showing the disassembly and the Retr0bright process to remove the yellow tint. I will then detail the cleaning of the keyboard and the S-Video modification of the video output circuitry.
Disassembly
The Commodore VIC20 is very easy to disassemble. Just three screws keep together the two halves of the case. Once removed, the top half can be carefully opened, keeping a good care not to break the very fragile plastic hinges holding together the back of the case. Those hinges are very fragile and in my VIC20 they break many years ago (yes, this is not the first time I open this computer). Before putting back everything together, it will be important to reconstruct them so that the case will be once again mechanically sound. Figure 2 shows the computer's internals.
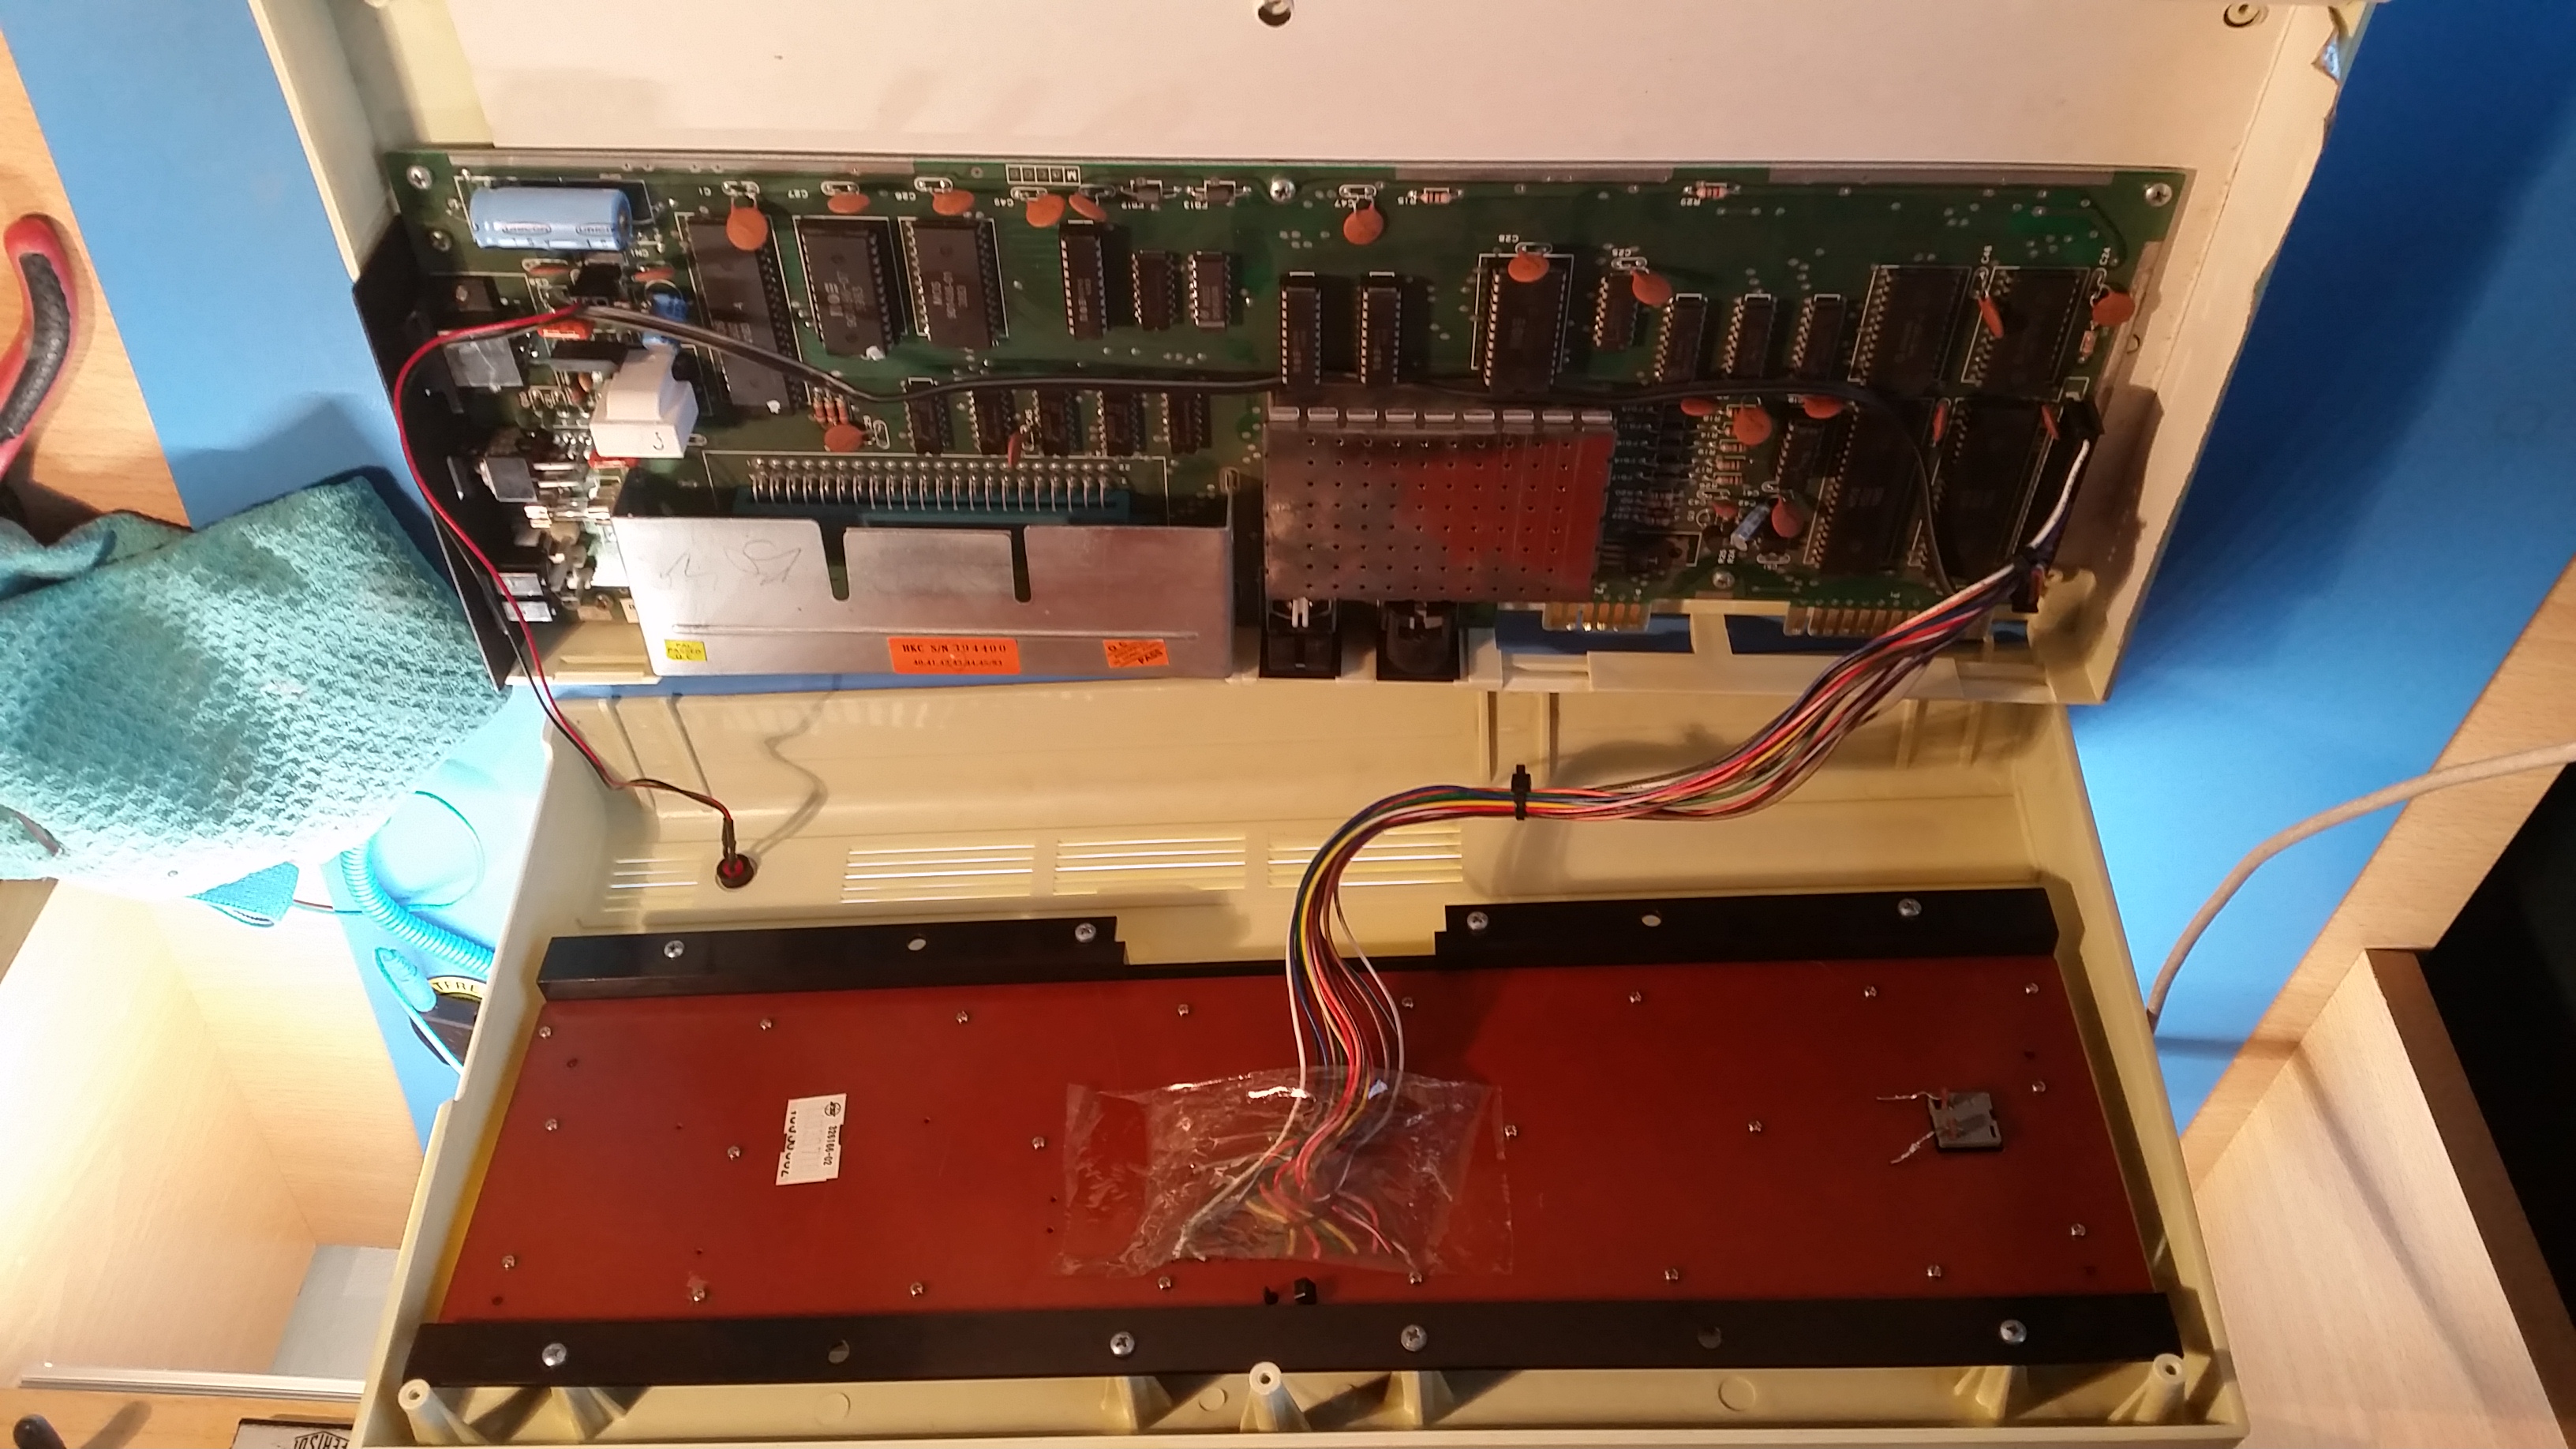
Fig.2: The VIC20 internals
My VIC20 has a DIN power supply connector, similar to the one of the Commodore 64. This identifies my computer as the later "cost reduced" version, with the small motherboard visible in figure 2. It is a very simple system, equipped with small static memories totalling 5 KiB whose only 3.5 are available without memory expansion cards.
Removing the badges glued on the case is rather difficult. I once made the error to leave one in place during the Retr0brighting process of an old keyboard and I saw that unfortunately it can be damaged during the process. To avoid to deform them, I pried them gently on their length with a cutter blade. However, as it can be seen in figure 3, it is rather difficult to remove the old glue that is transformed into an unpleasant yellowed gunk. Once that finished, the two plastic halves of the case must be washed very thoroughly internally and externally (this take a lot of time).
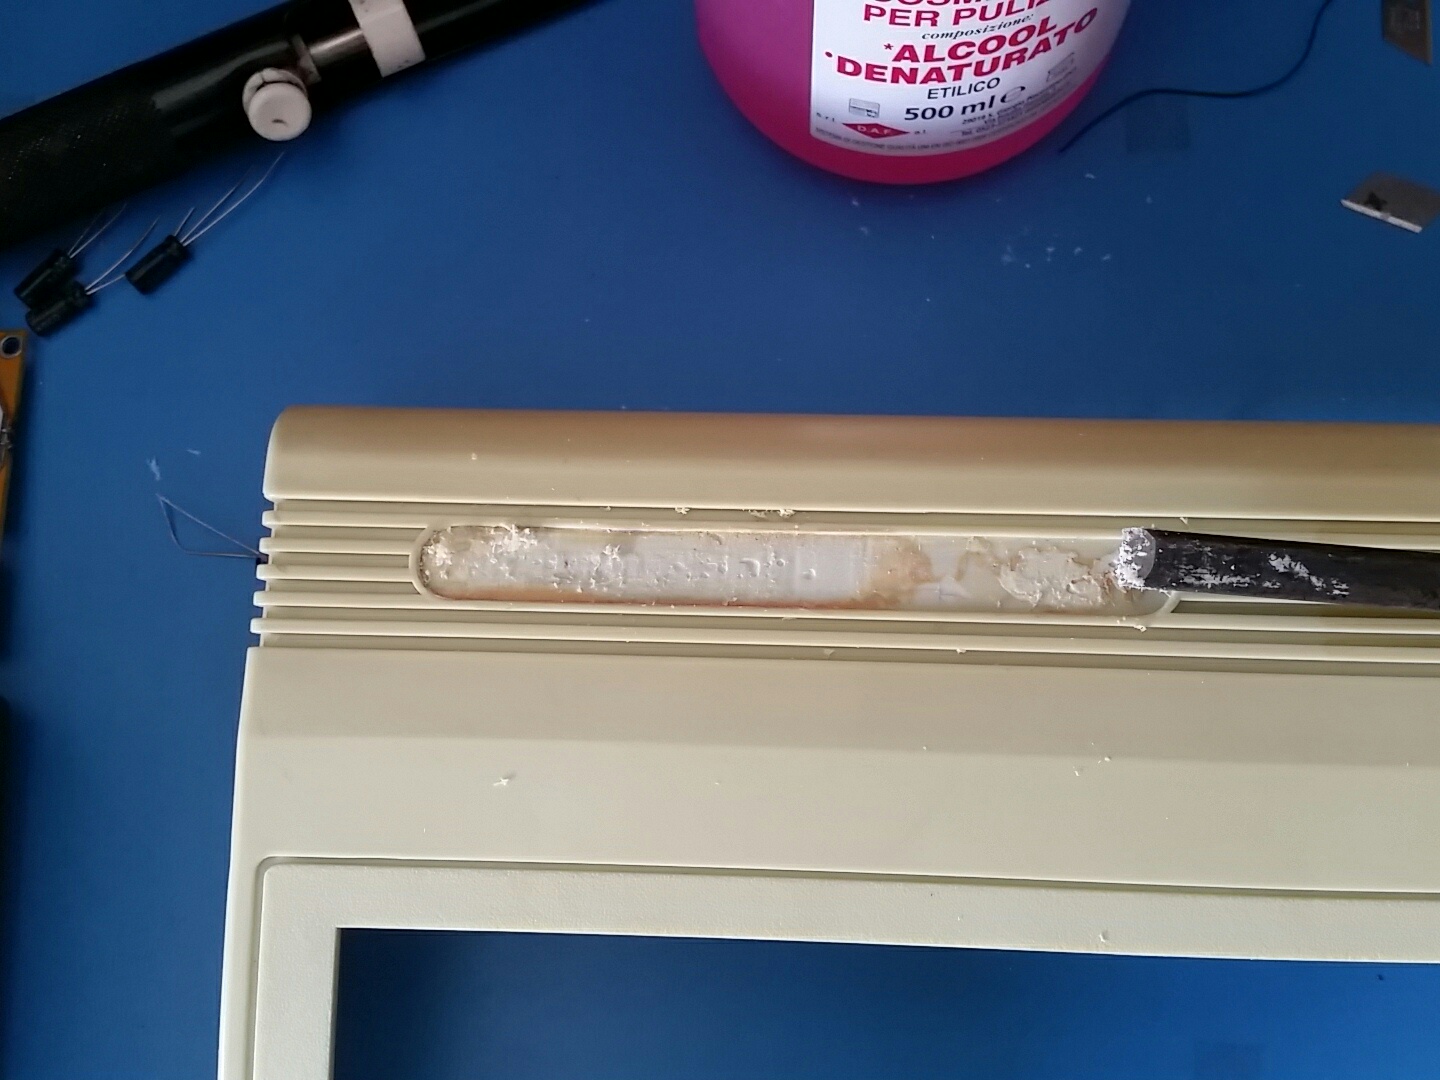
Fig.3: The badges must be removed and the old glue tends to yellow as the plastic does
The Retr0bright process
As we saw, the VIC20 case is plastic-made, with a polymer called acrylonitrile butadiene styrene or ABS. This material is thermoplastic and has a good mechanical strength. The ABS is very well known in the 3D-printing community as it can be extruded easily and it is widespread in low-cost printers. However, clear ABS (not only in vintage computers) tends to yellow in a varying amount after a certain time.
This phenomenon is very well known [1], yet not everyone agrees about the origin of it, at least if one reads only Internet sources. For example, most forum posts and discussions (look for example [2]) indicates the bromide contained in certain flame-retardants added to ABS as the main responsible of the yellowing effect. I personally do not like very much this theory, as it does not seem to me to be based on very accurate bibliographical researches and solid studies: "plastic gets a yellow colour as it contains brominated additives, elemental bromide is brown therefore it is at the origin of the effect." Of course, this theory is repeated a certain number of times and, albeit simplistic, it becomes the version diffused by the majority of people. This theory is rather carefully criticised in [3], a post which seems to me much more convincing and documented (with references to published studies in scientific reviews) that it is the very polymer to be at the origin of the yellowing effect. This theory is basically the same that R.D. Deaning was describing in 2007 when interviewed by Benj Edwards in [1]: These [polymers] all tend to discolour and embrittle gradually when exposed to UV and/or heat. They become oxidized and develop conjugated unsaturation, which produces color. They crosslink or degrade, which causes brittleness." I understand perfectly that access to specialised literature is not possible for everybody and that few people are chemists such as the author of [3]. However, I noticed that the specialist's opinion in [1] has not been listened to and the majority of people preferred the simplistic theory involving brominated flame retardants.
The bad news is that the yellowing effect is not a simple reaction that can be reversed, but one of the effects of the ageing on plastic that tends to become brittle. The fragility of the case of my VIC20 has already clearly manifested itself when the hinges broke. It is however clear for everybody that the effects are accelerated by UV light and high temperatures.
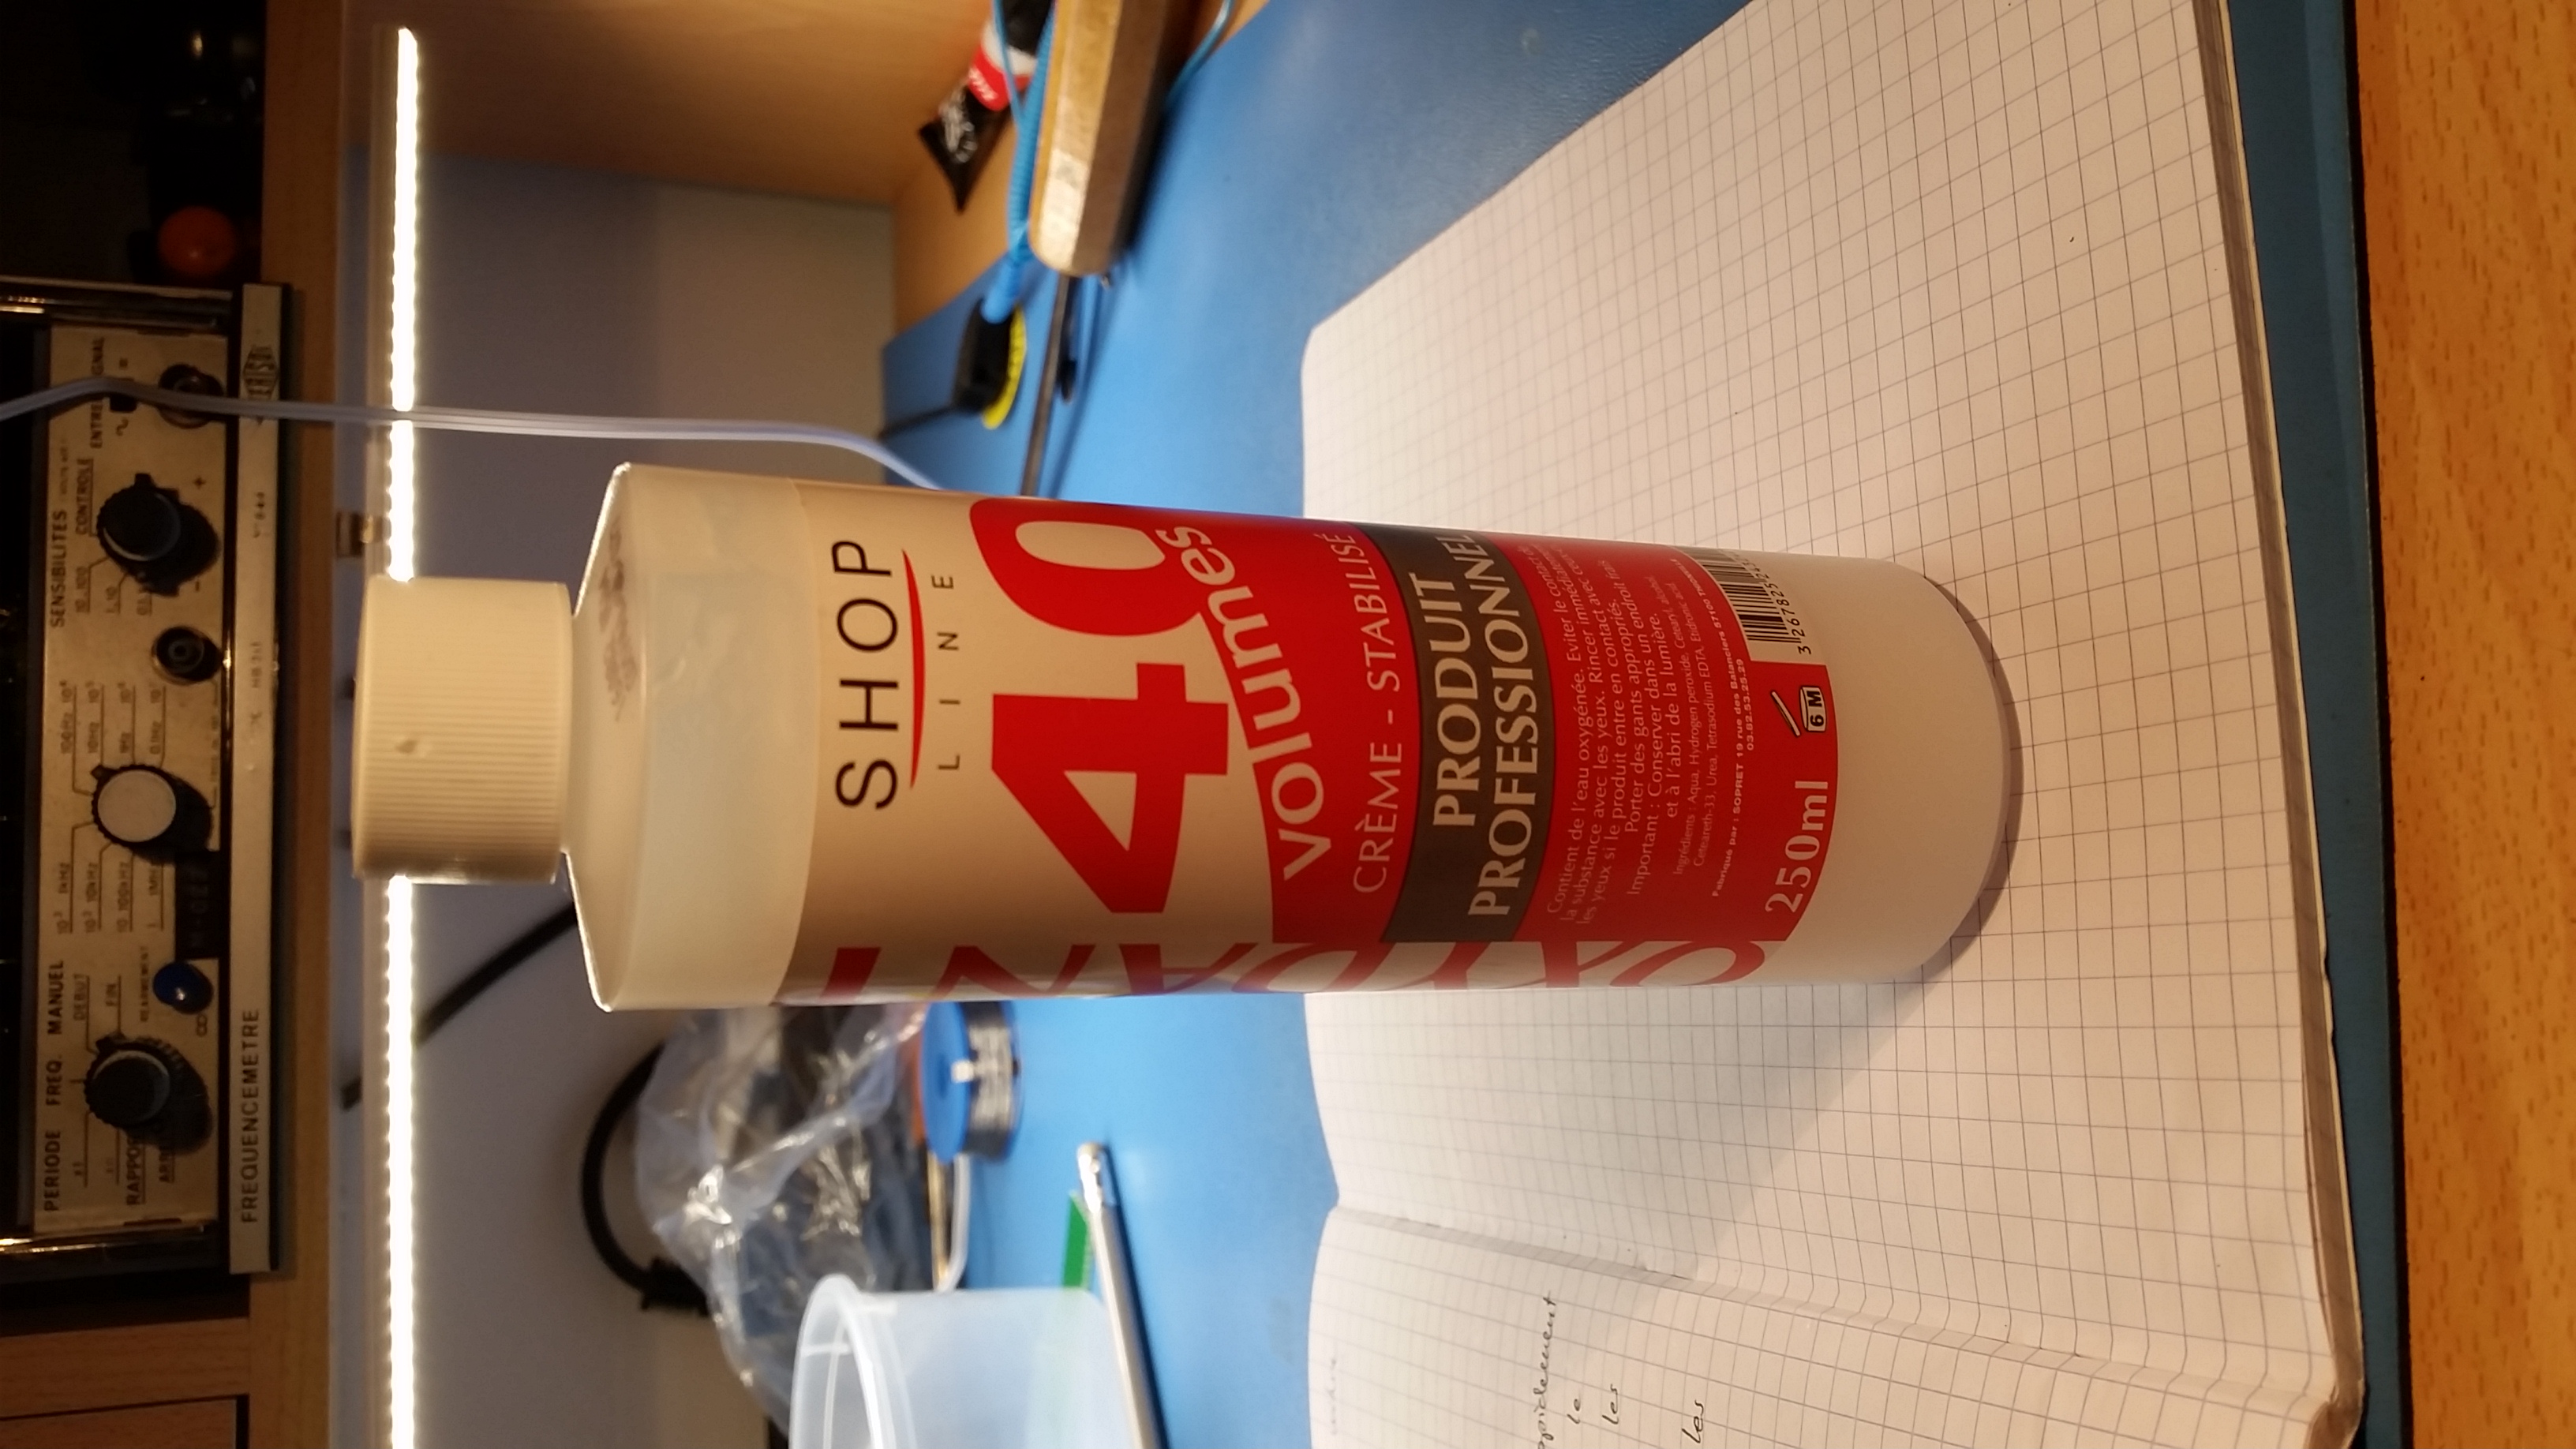
Fig.4: The hair oxy cream I used for the retr0brighting process, containing hydrogen peroxide at 40 volumes (12%).
Everybody agrees that the view of a strongly yellowed computer is very unpleasant. Around 2007, retrocomputing enthusiasts discussing in specialised forums discovered that oxygenated water (hydrogen peroxide) can restore the yellowed plastic to the original colour [4]. One of the difficulties of the process was that large quantities of oxygenated water (relatively concentrated, for example 12% or 40 volumes) are needed to completely submerge all the plastic pieces to be treated. Therefore, recipes have been put together and discussed to allow the application of the peroxide as a cream. In fact, this is very practical as it can be put in reasonable quantities with a brush directly over the pieces to treat. The most well known recipe is probably Terry Stewart's (Tezza's) one. He is a well known retrocomputing enthusiast from New Zealand [5]. Those recipes and the whitening procedure are often called Retr0bright (written with a zero). The plastic to treat, once treated with the cream, has to be exposed to direct sunlight so that the peroxide can work, helped by UV light.
Nowadays, it is not clear if the treatment is harmful to plastic or not. What it is clear is that unfortunately Retr0bright a piece does not yield a permanent and a very long lasting result in many cases. The very Terry Stewart well documents this in [6]. It is said often that a clear coat may protect the plastic pieces from UV and oxygen.
For what concerns my VIC20, I chosen to attempt to retr0bright it for the following reasons:
1-Even if the results are not permanent, however the treatment is very effective for a certain duration (I hope several years) and the result is extremely pleasing.
2-I did my tryouts on an old monochrome monitor very yellowed. The result was absolutely outstanding and I did not feel that the plastic embrittled much more than what it already was due to its age.
3-I can repeat the process in a few years.
However, I do not think at all that it is a good idea to treat the pieces with a clear coat. It is not certain that this will help preventing the yellowing and it is sure that it will make the plastic surfaces unaccessible for future interventions. Several tests indeed seem to suggest the clear coat is not effective, as it may be thought by a simplistic interpretation. For example, in
[7], edd_jedi writes "As promised, here's the results a year after Retr0brighting. To recap, I treated the main fascia and the lower drive cover, but covered the drive cover in Plastikote to cut off the oxygen. [...]
Compared to the non-yellow 'control piece' on the left, they have both yellowed again at exactly the same rate. Only now, I can't retrobright the driver cover again as it's sealed "
I do not like very much messing with chemicals and I was searching for a simple solution for the retr0brighting recipe. I chosen to use an hair oxy cream (visible in figure 5), already sold as a cream in beauty shops. It was funny to see how in my case the shop owner was almost overzealous trying to to convince me that the main ingredient was ammoniac and not hydrogen peroxide even if the composition as written on the bottle said the exact opposite thing...
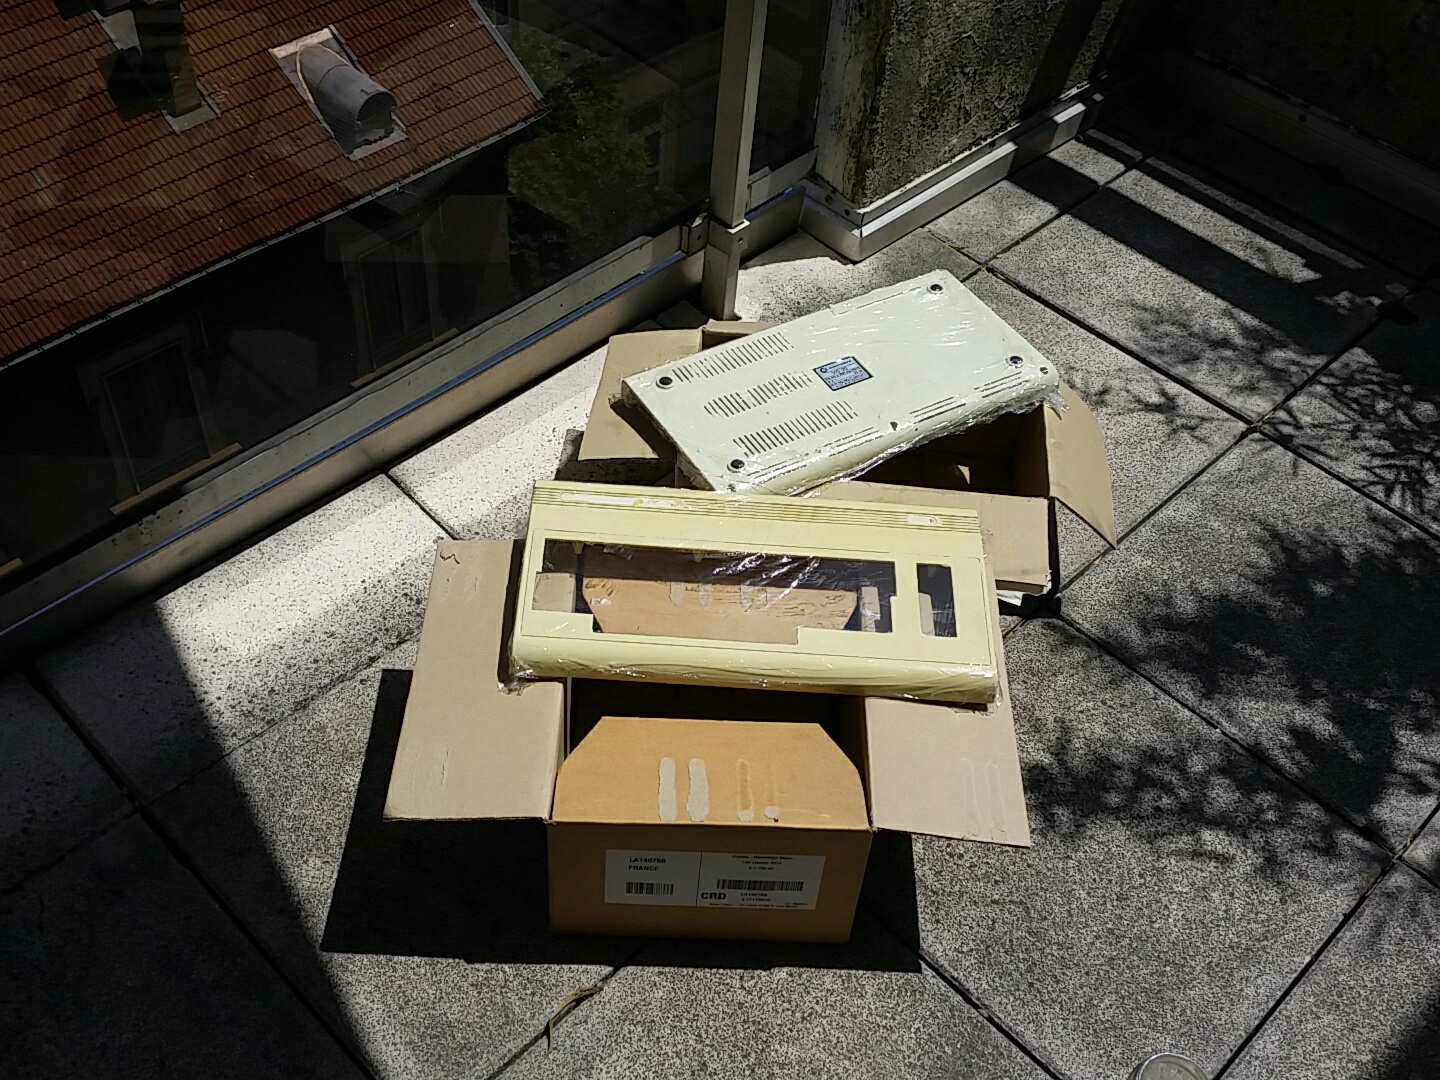
Fig.5: The Retr0brighting process. The computer case has been covered by oxy cream containing 40 volumes hydrogen peroxide and, protected from evaporation by plastic wrap. A sunny day of end of June will do the rest...
To revert the yellowing, the plastic pieces to be treated have to be carefully covered by a generous amount of oxy cream and must be exposed to direct sunlight. To avoid that the cream dries prematurely during the process (that can last several hours), a well-known solution is to use plastic wrap. However, the process must be followed carefully and the pieces must be moved several times so that the result is the same everywhere. I did not hesitate to reapply cream in the areas which appeared dry under the plastic wrap. Everything is finished when the whitening is sufficient, keeping in mind that it is better not to insist too much... The best is the enemy of the good
To stop the action, the case must be rinsed abundantly with clear water. The cream must be completely eliminated and everything must be set to dry for several hours before reassembly everything.
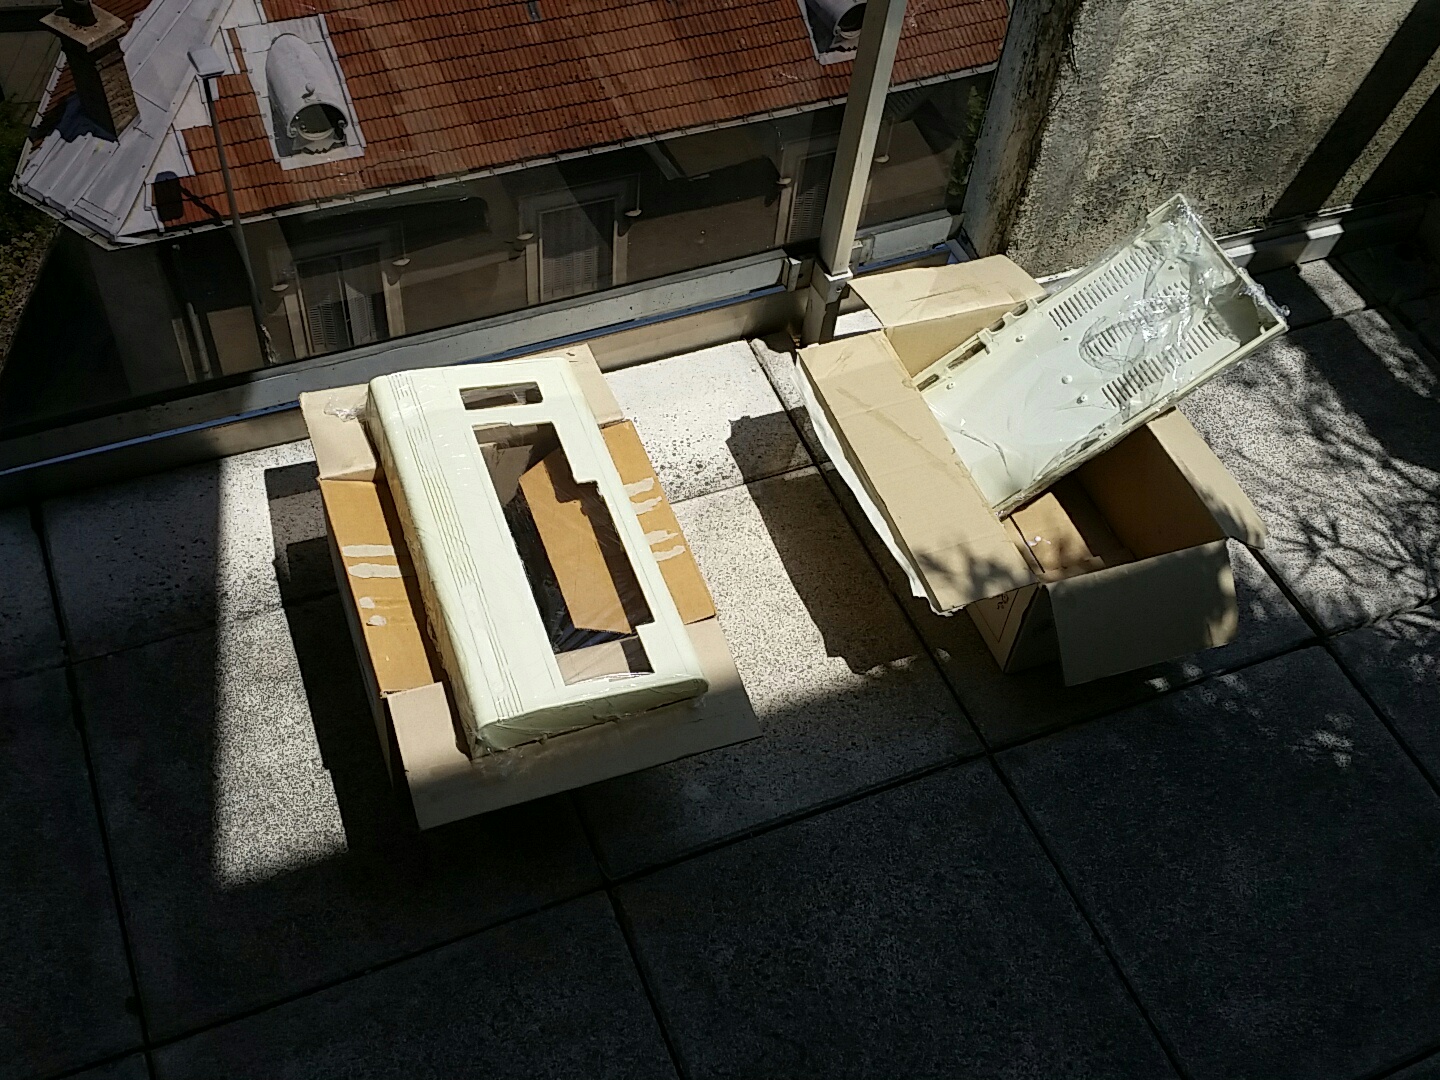
Fig.6: To help the sun doing the same work everywhere, the pieces must be moved regularly
Hinges repair
A difficulty I had to solve was that the two halves of the case are kept together on the back by small plastic hinges. Mine broke probably twenty years ago, the first times I opened this machine (I recall I had to change a fuse). The remaining ones broke in my hands this time, as shown in figure 7. The brittleness and fragility of the ABS after more than 30 years is clearly visible on those details, even if the overall case integrity is not compromised (for the moment). I do not have the impression that the Retr0brighting process made thing worse: the hinges broke before it and it is a sign of the age of the machine. How will my VIC20 be in 2047?
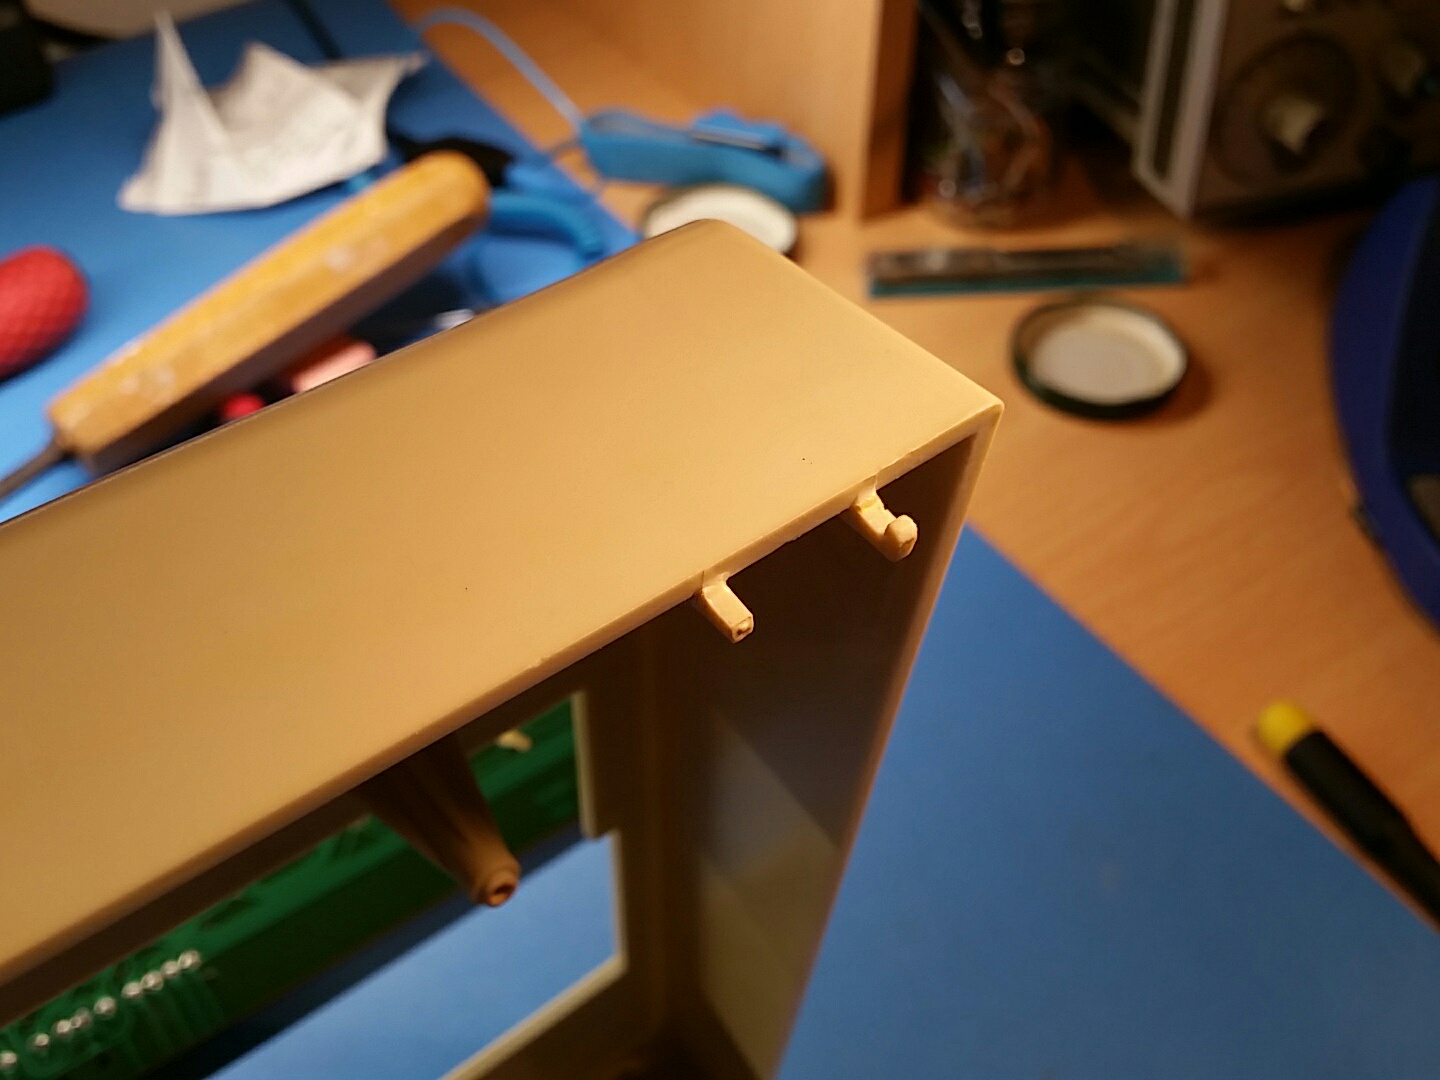
Fig.7: The plastic hinges, broken long ago, must be repaired
I choose to cut small bits from an old ABS box for electronic circuits (very yellowed, by the way, as visible in figure 8), file and glue them on the original supports. To make everything sturdier, I followed an advice I received from Damian Peckett on Twitter [8]: I forced inside the plastic a nickel-chrome wire heated by an electric current, as visible in figure 9. The ABS is thermoplastic polymer and will become hard again after the wire has been pressed against it, thus keeping the wire in place. It can be cut there and it will make everything robust enough.
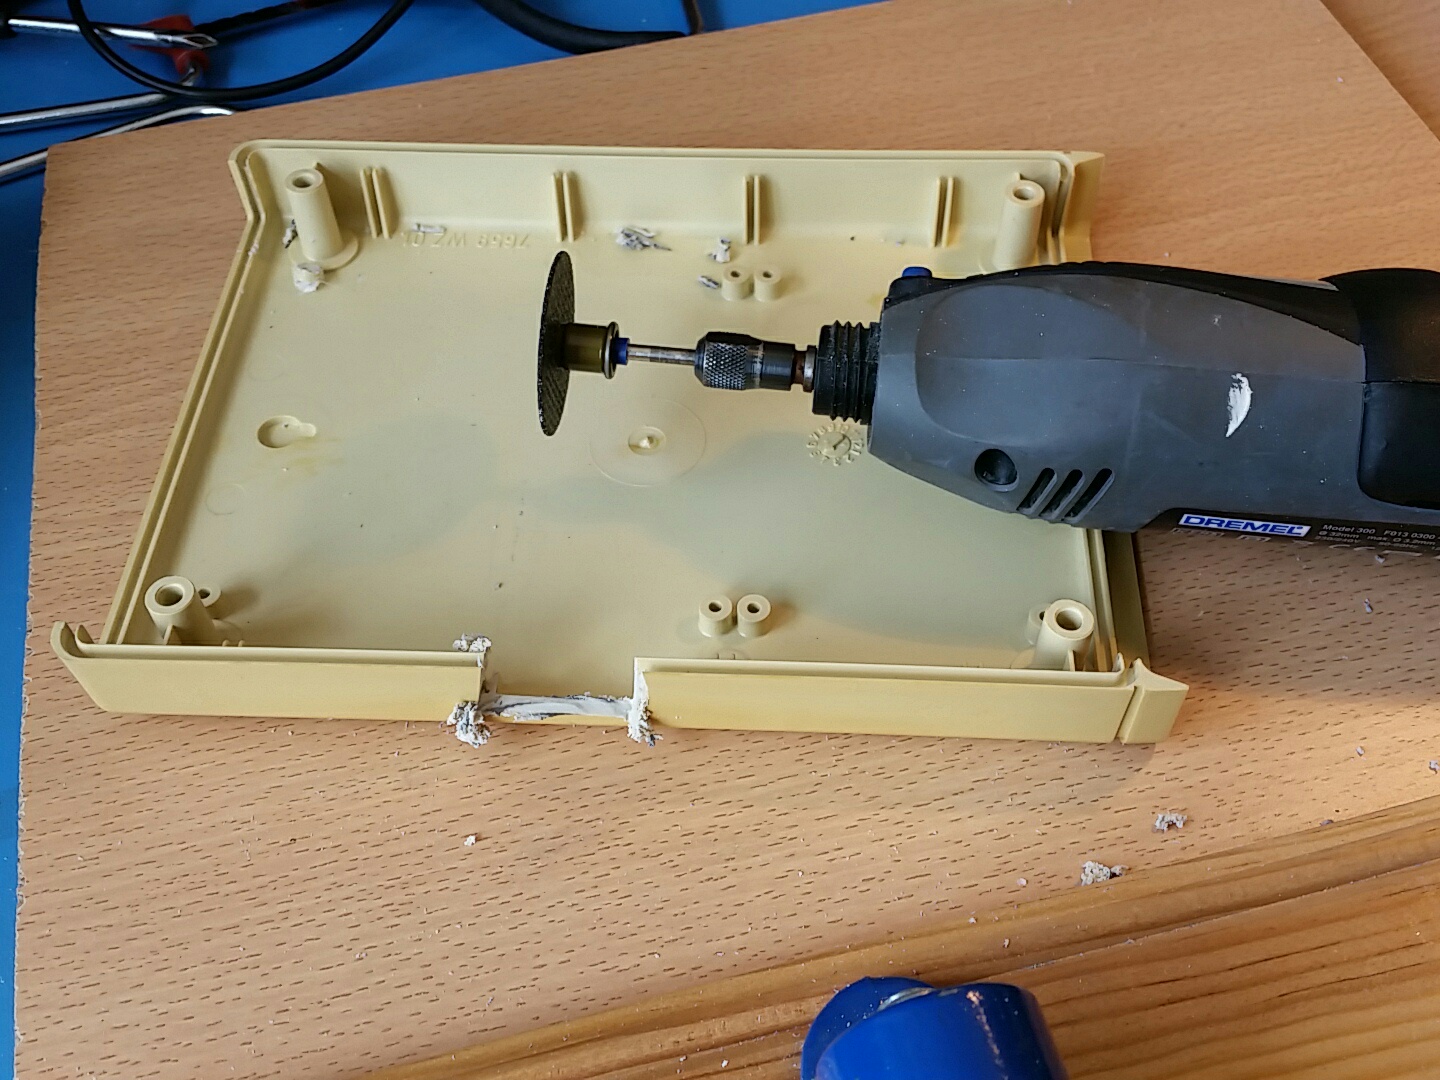
Fig.8: Small plastic bits are cut from an old and yellowed ABS case

Fig.9: A solution is found: plastic is glued with cyanoacrilate and reinforced with a hot NiCr wire pressed against the hinges, cut and left in place once cold
Once the glue cured and everything finished, I could appreciate the result shown in figure 10, that is very nice. It is impressive to see at which point the overall impression is much better. Even if I know that this result may not be permanent, I am very happy that my very first computer (a sort of a time-machine for me) is young again.
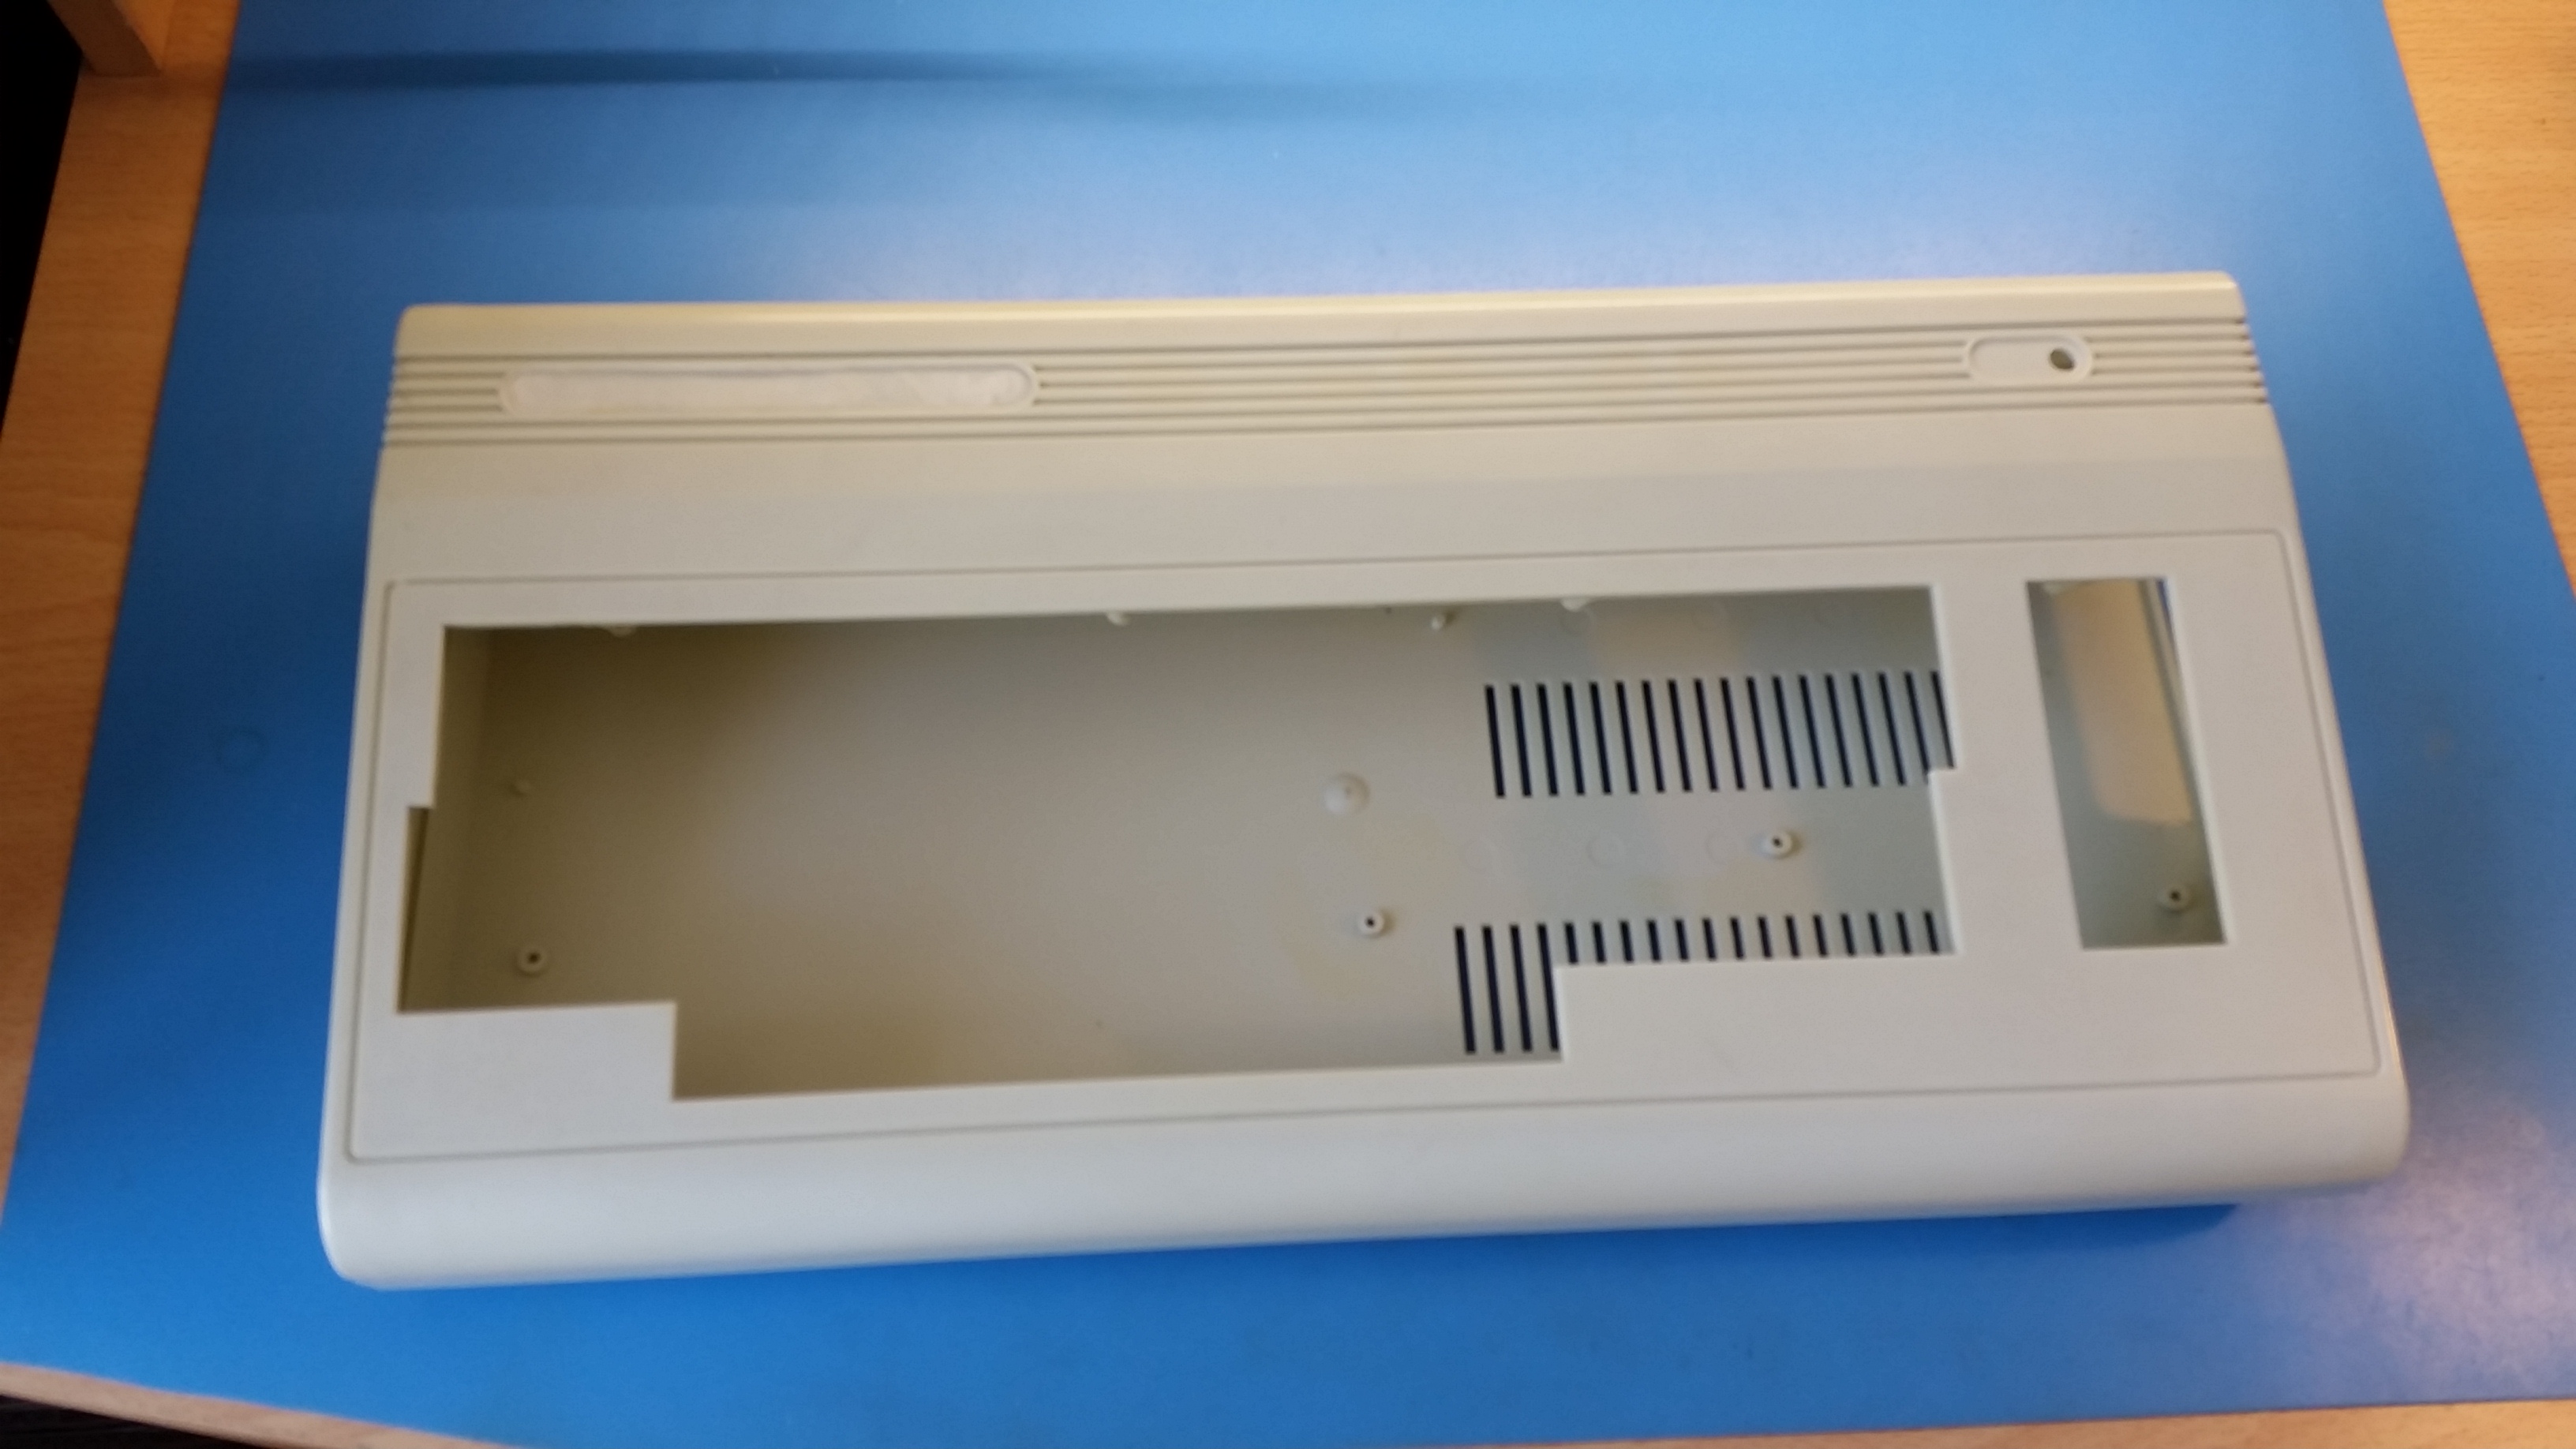
Fig.10: The ABS case, back to the original colour
Cleaning the keyboard and S-Video output mod
Two issues remained. The first one was that some keys were not working properly. The second one was that I use quite often a monochrome monitor and the image quality from the composite output was not very high. In fact, the chrominance signal is added to the luminance signal and creates some unpleasant artefacts.
To solve the first problem, the only thing to do is to disassemble the keyboard and clean it. This is not very difficult if one does not need to remove all the keys one by one. You only need to unscrew the screws on the back of the printed circuit board to remove it from the rest of the keyboard. This PCB is visible in figure 11. For the shift-lock key, I cut the wires many years ago so that I can connect together and separate again very easily with a little solder joint. It is very simple and effective. By the way, my VIC20 has grey function keys whereas the first one's were brown. My VIC20 has been built in 1983 and I think that Commodore used the same keyboard for the VIC20 and the C64 at that period.
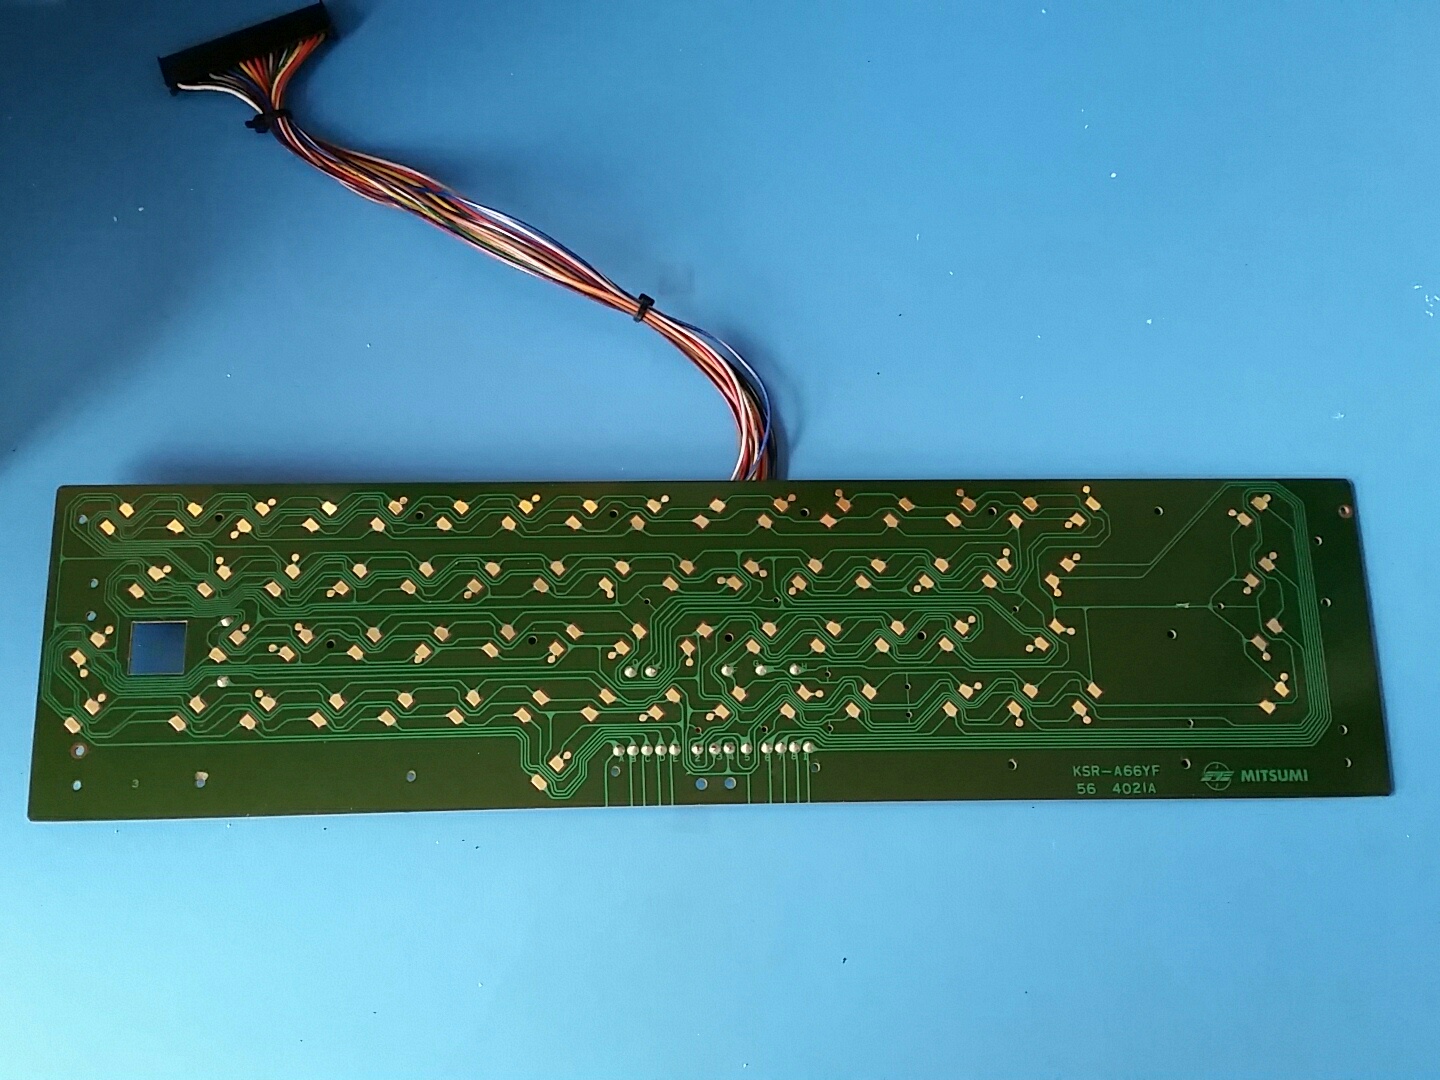
Fig.11: The printed circuit board of the keyboard. Contacts are gold-plated
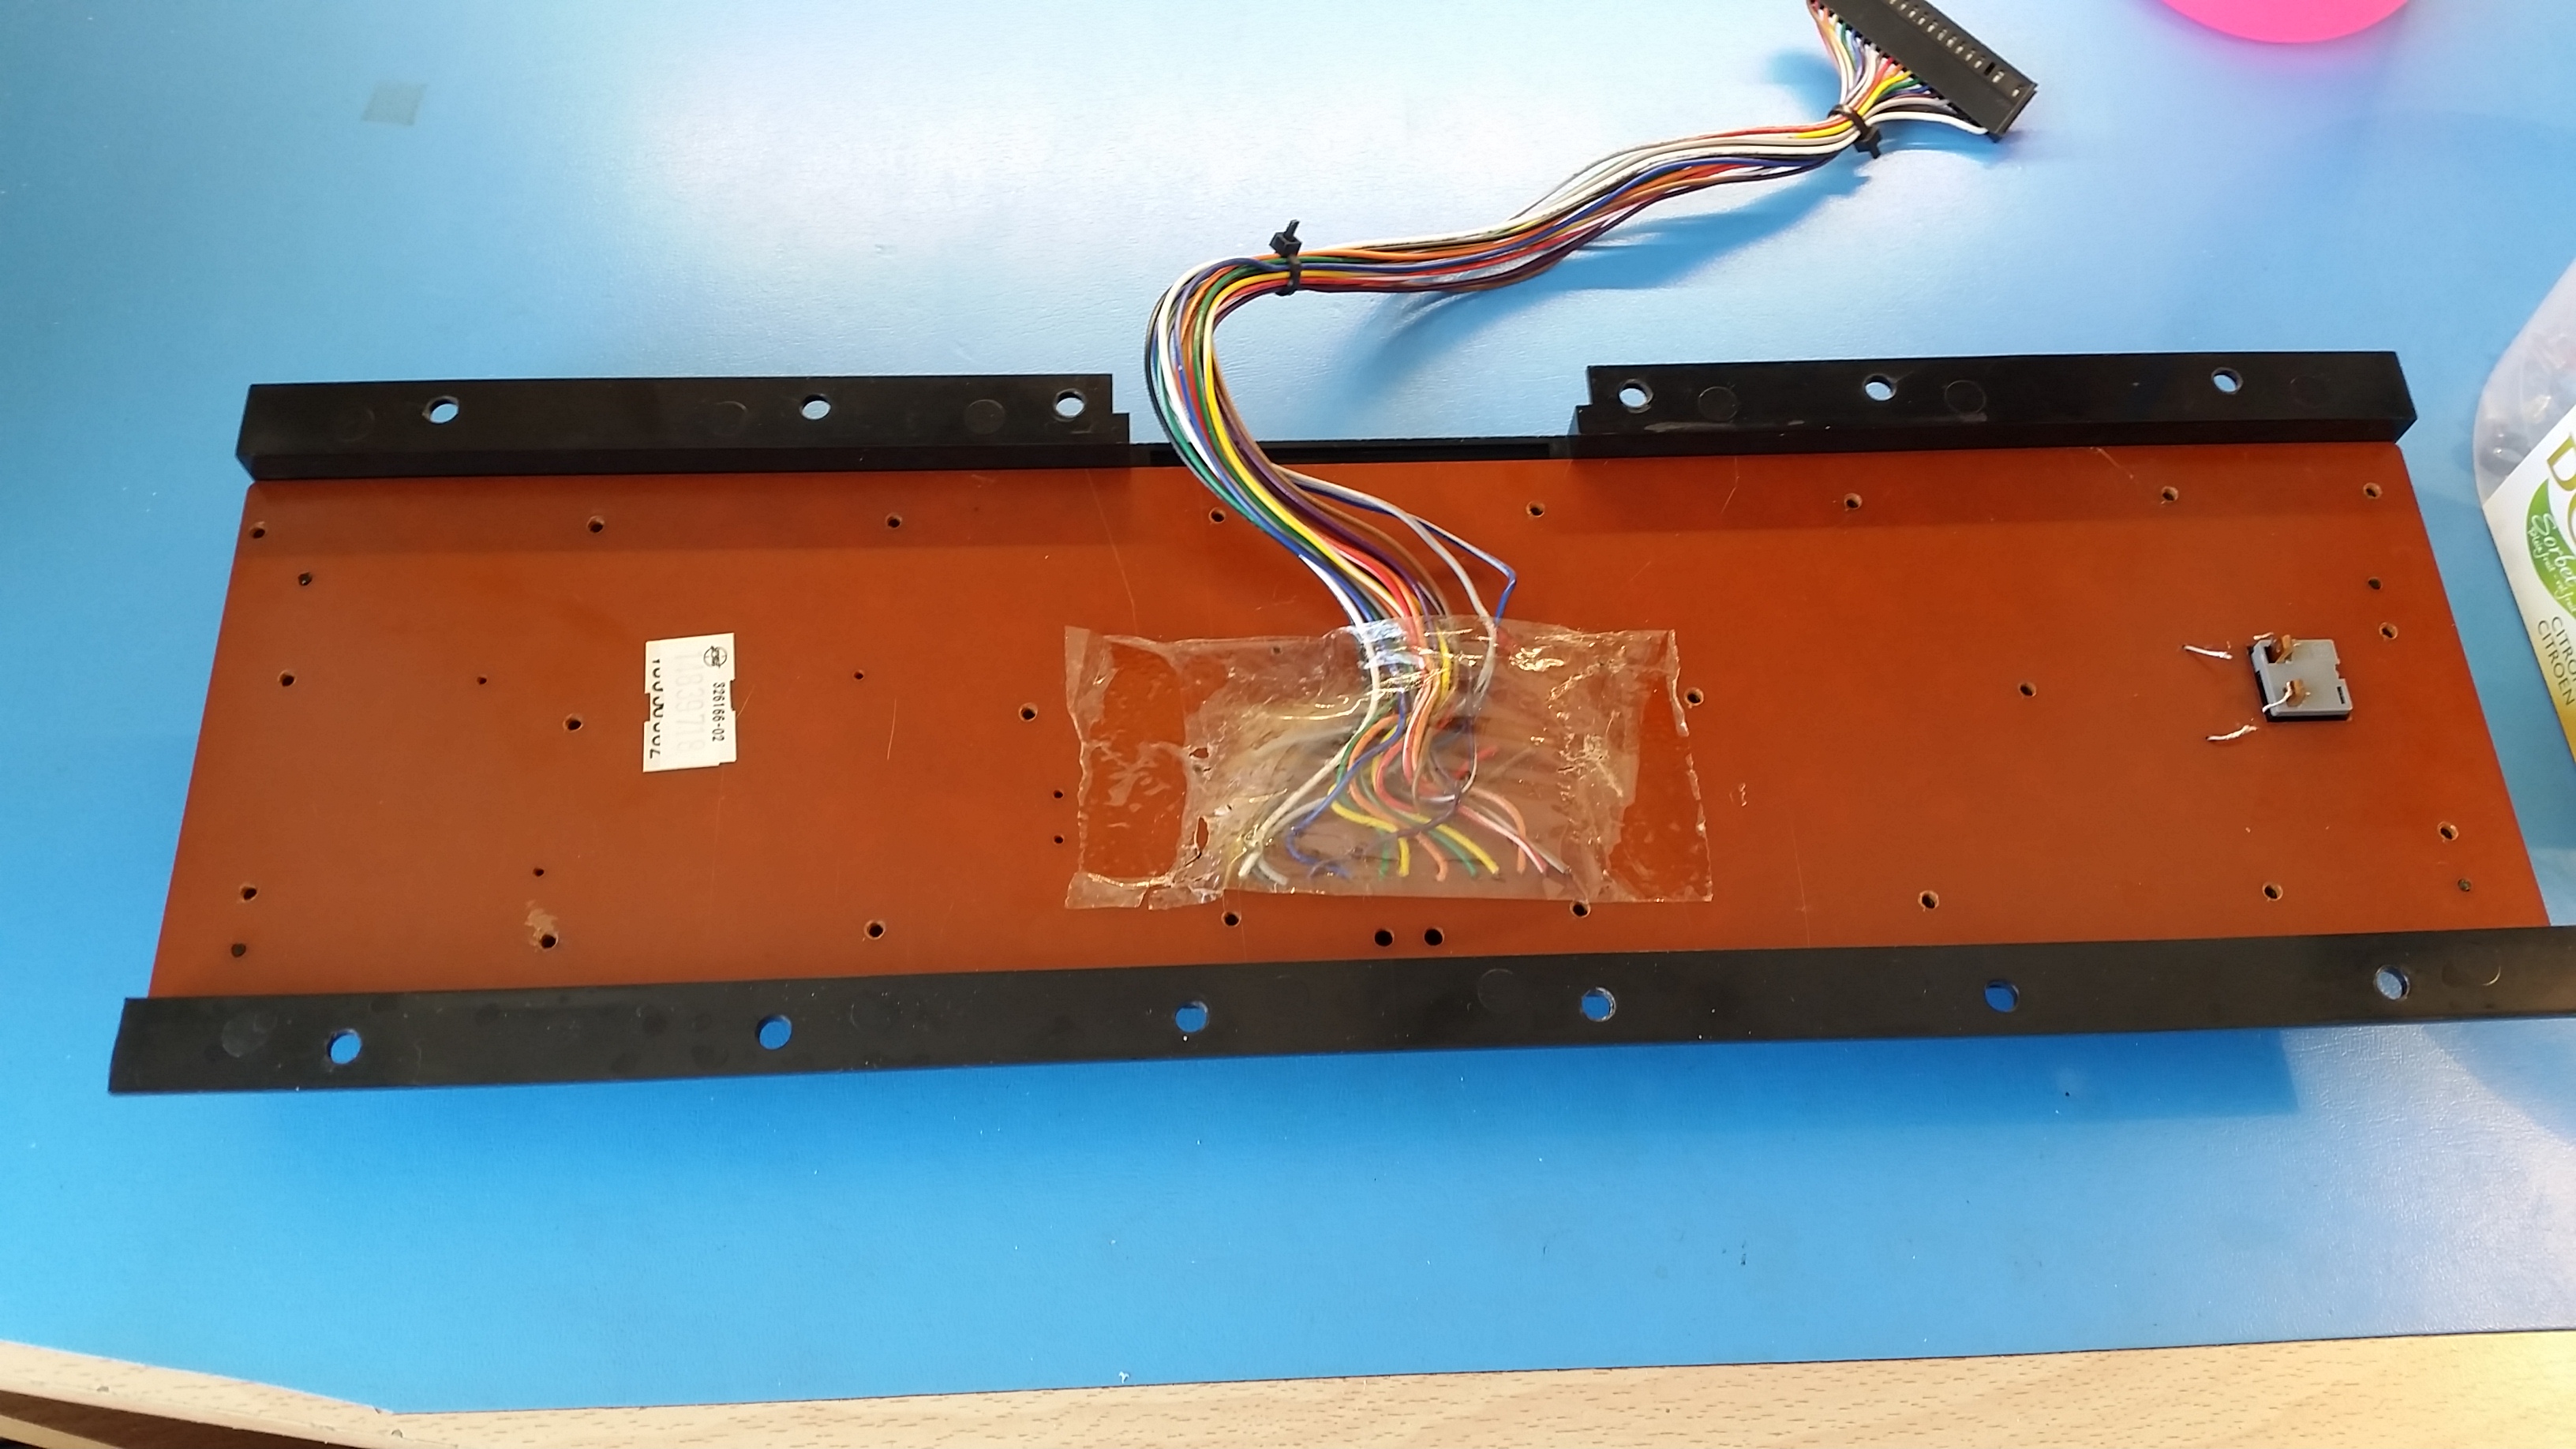
Fig.12: The reassembled keybard, just before putting all the little screws that keep everything in place
Connection wires are kept in place with adhesive plastic that shows the signs of time. The purpose is to avoid breaking the wires when manipulating the keyboard, the part very close to the solder joint is stressed and fragile. Figure 13 shows how I replaced the original plastic with some adhesive Kapton, that should last very long without problems.
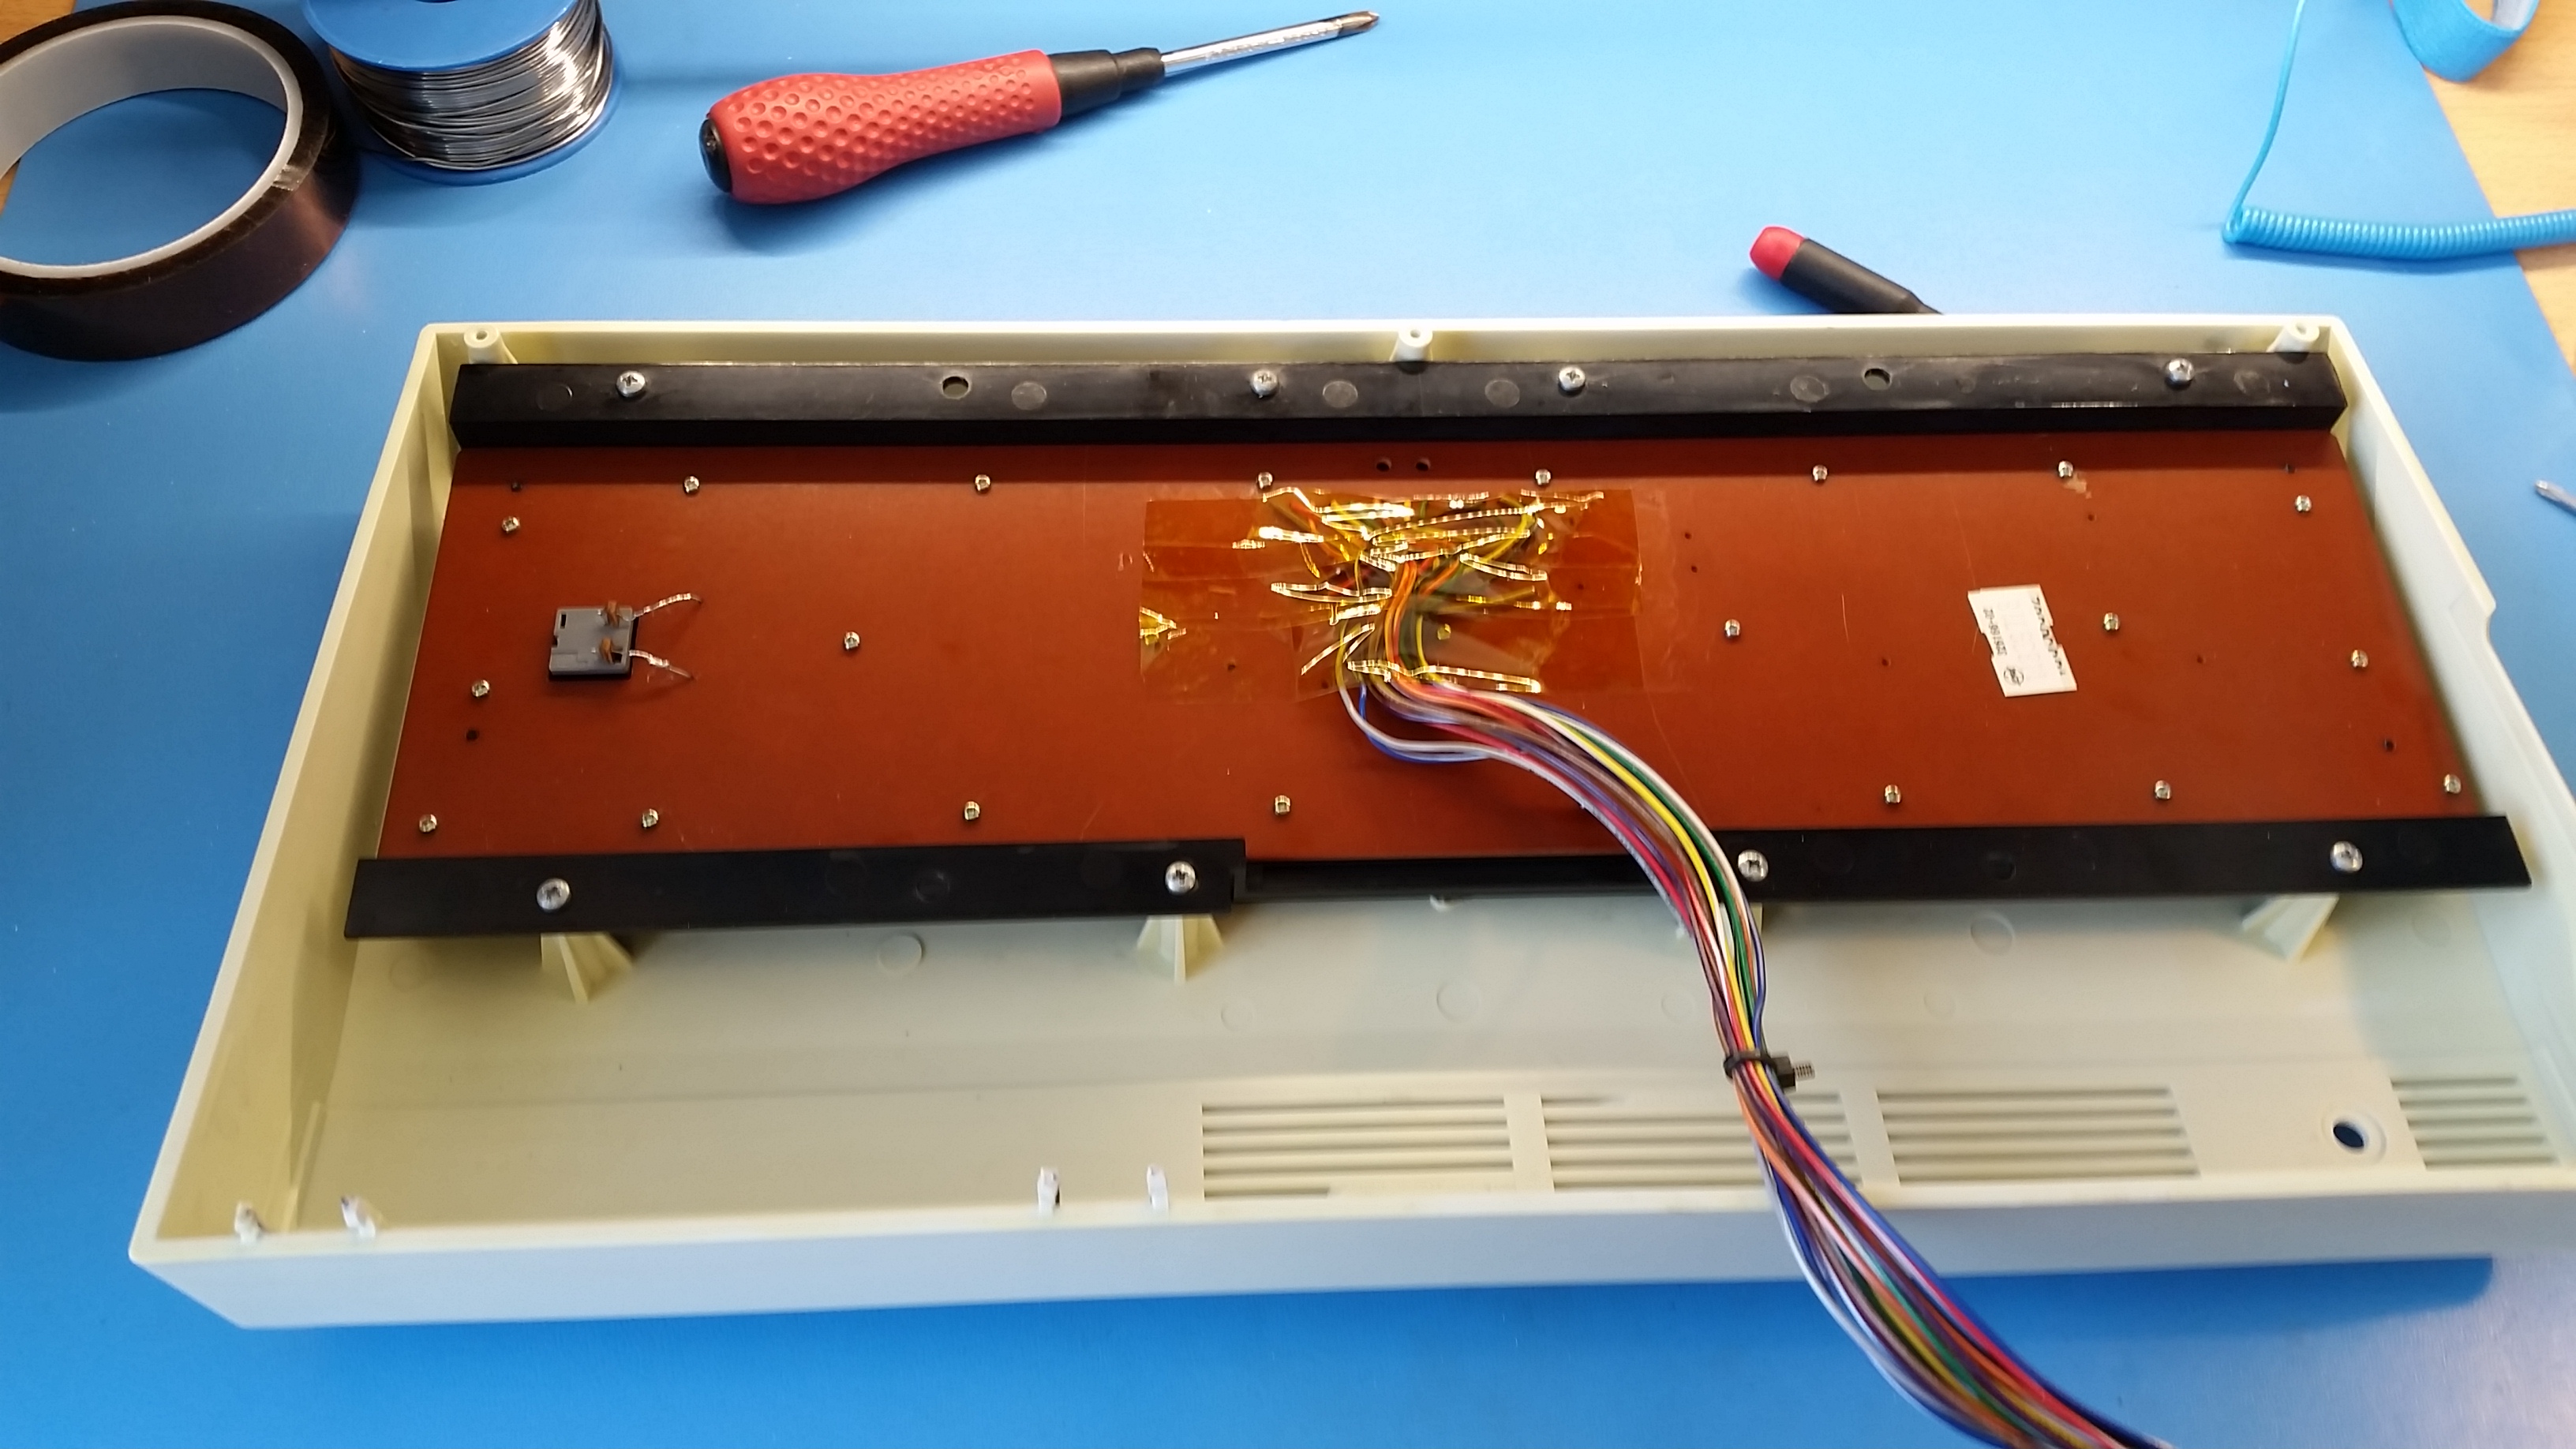
Fig.13: The assembled keyboard is put on the case. The old adhesive ribbon is replaced with Kapton
I then choose to modify the video output of my VIC20 to obtain separate luminance and chrominance signals. This allows to use S-Video cables to connect the computer to a modern television set, without using the composite signal that is not of an excellent quality. In my case, the luminance (with synchronism signals) allows to obtain a much better image on my monochrome monitor. The description of that modification is available in [9]. I do not think it is a good idea to do it if you do not have a certain acquaintance with electronic circuits, as you have to cut traces and modify the original VIC20 circuit with a soldering iron.
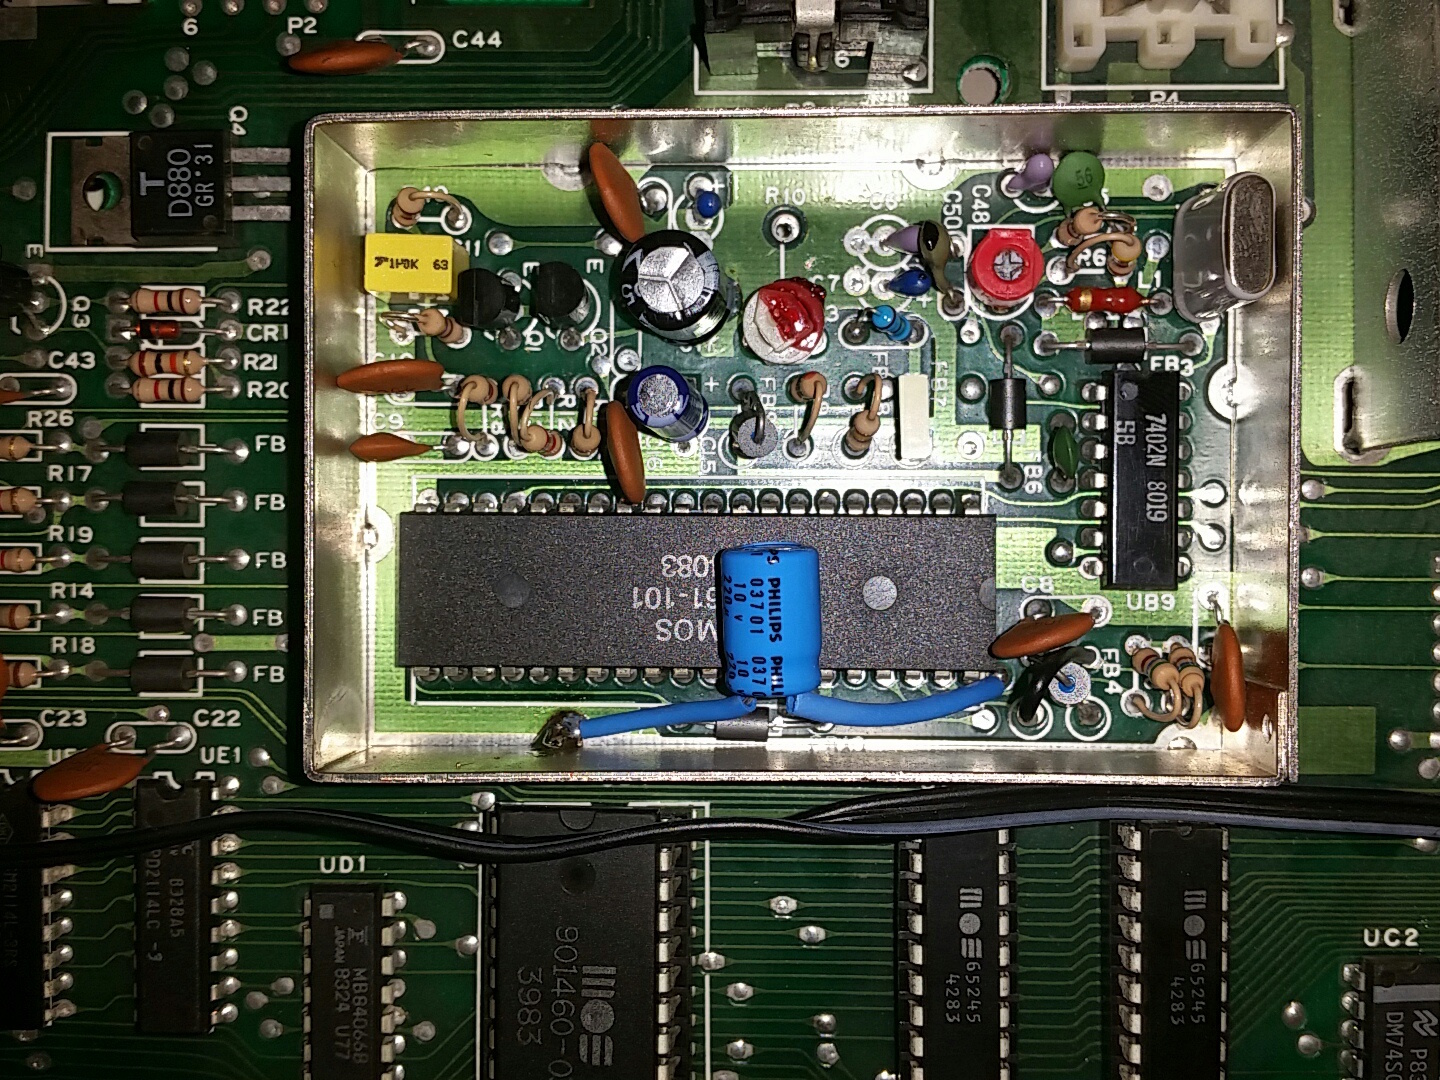
Fig.14: A view of the video circuit, with the S-Video modification done
Figures 14 and 15 show the result of the mods on my board. I will not describe here what it has to be done (once again, it is described in [9]). To summarise briefly, one has to disconnect the chrominance output of the VIC chip from the node where it is summed to the luminance signal and connect it directly on the output connector. The luminance signal after the modification is available at the pin 4 of the output DIN connector, whereas the chrominance signal can be connected to pin 5. In my user manual, pins 4 and 5 are called "video high" and "video low" respectively, but they are tied together on the PCB. In figure 14, a 220 µF capacitor is visible, added to filter the power supply of the VIC chip and reduce noise on output signals. I have to admit that I did not notice any improvement adding this capacitor.

Fig.15: The S-Video mod on the back of the PC
Figure 16 shows a detail of my monochrome monitor fed with the luminance and sync signal alone. The image is much crispier and cleaner with respect to before with the composite signal. I want to build a SCART cable, but I am already quite happy of the result with the monochrome monitor I often employ with my vintage machines.
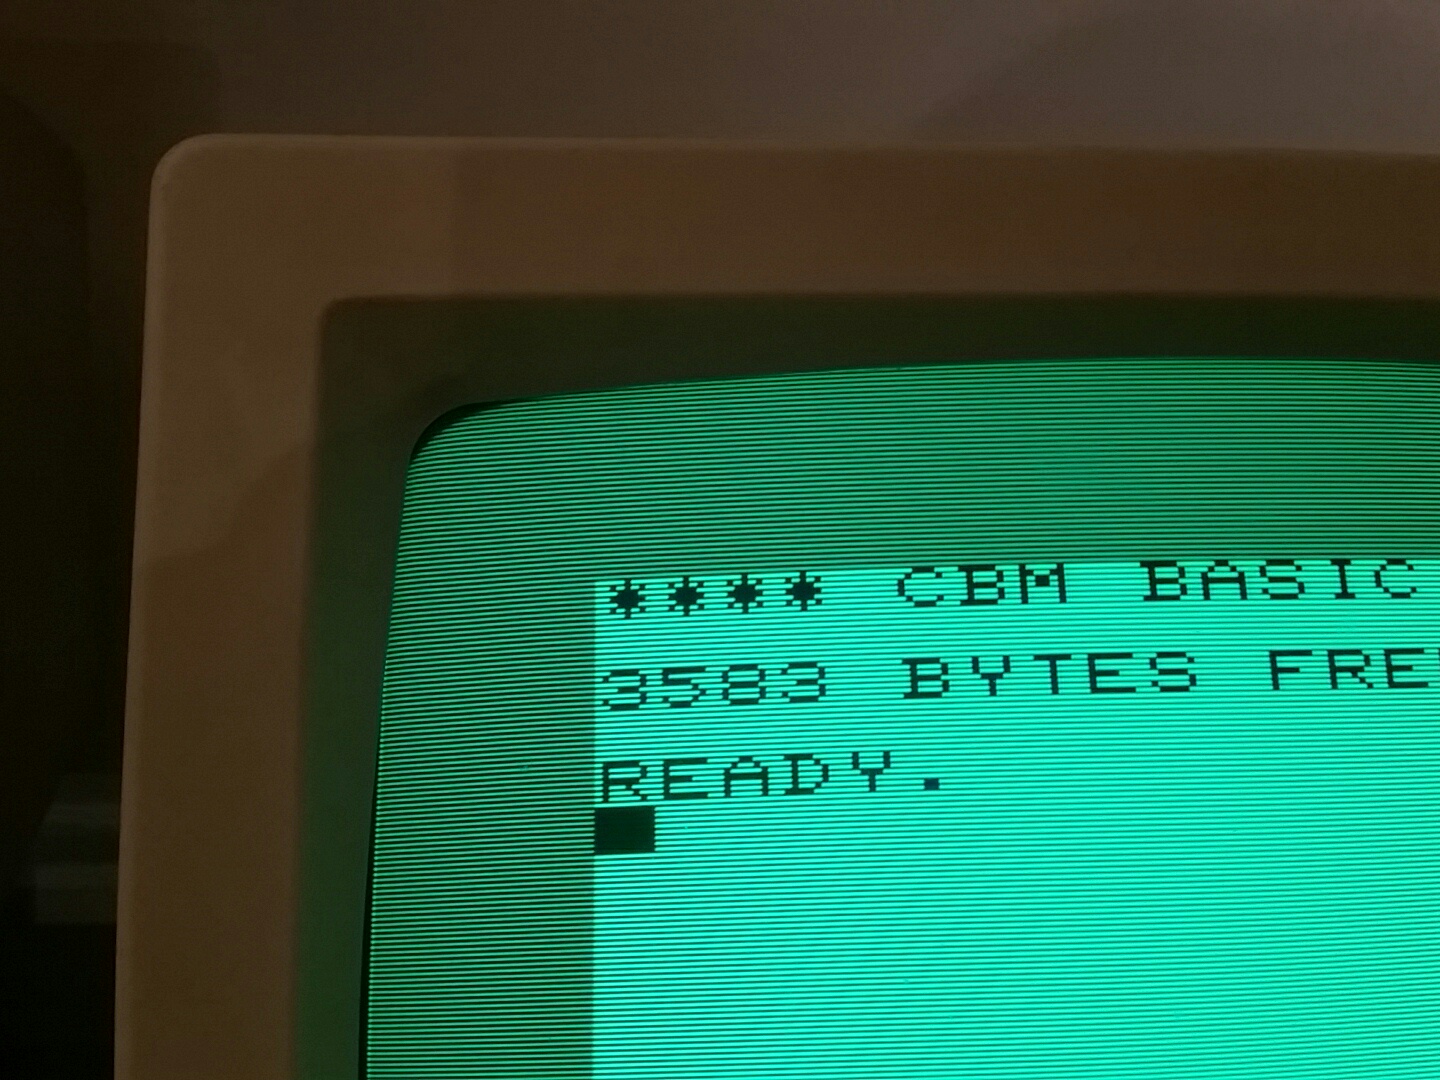
Fig.16: The crisp image obtained with a monochrome monitor fed by the luminance (and sync) signal alone
Reassembly
The VIC20 is not a difficult machine to disassembly and reassembly. The reconstructed hinges are fragile, but apart from that the reassembly is straightforward. Figure 17 shows the empty case when I tried to see wether the hinges were working. What a beauty!
Figures 17 and 18 confirm that and show a computer that seems to come directly from 1983.
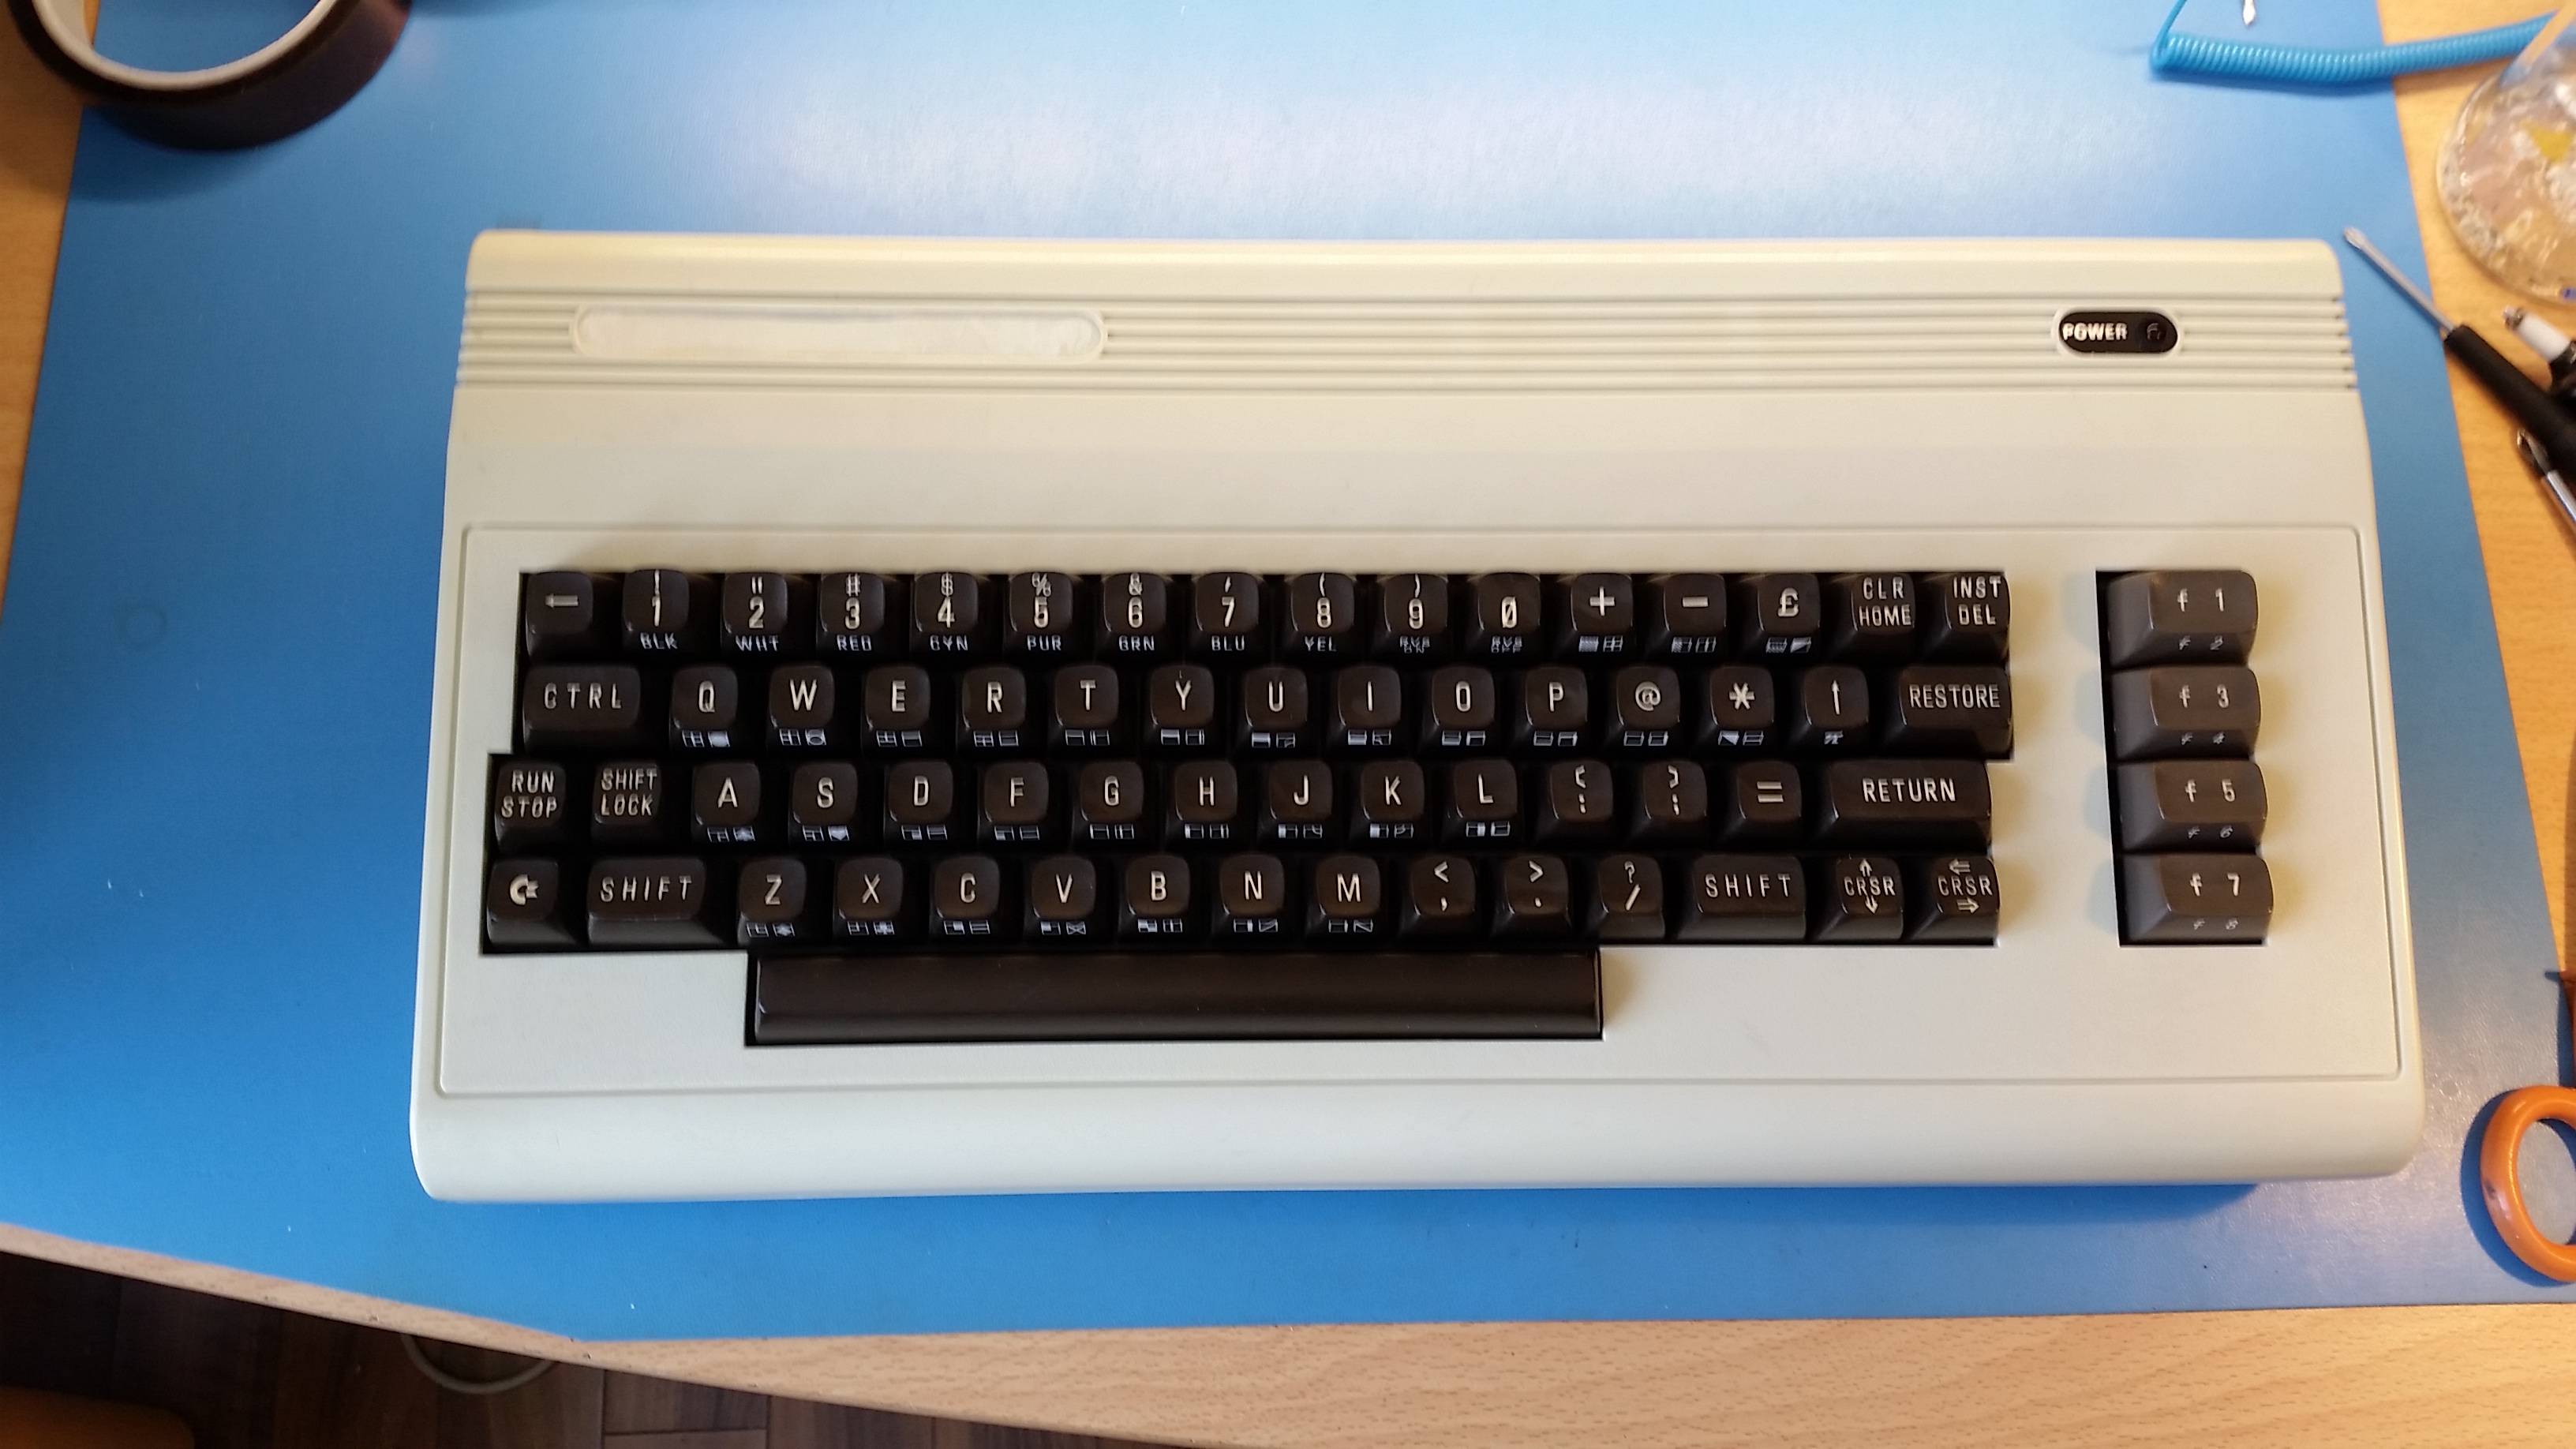
Fig.17: The two halves of the case together, before glueing the Commodore VIC20 badge
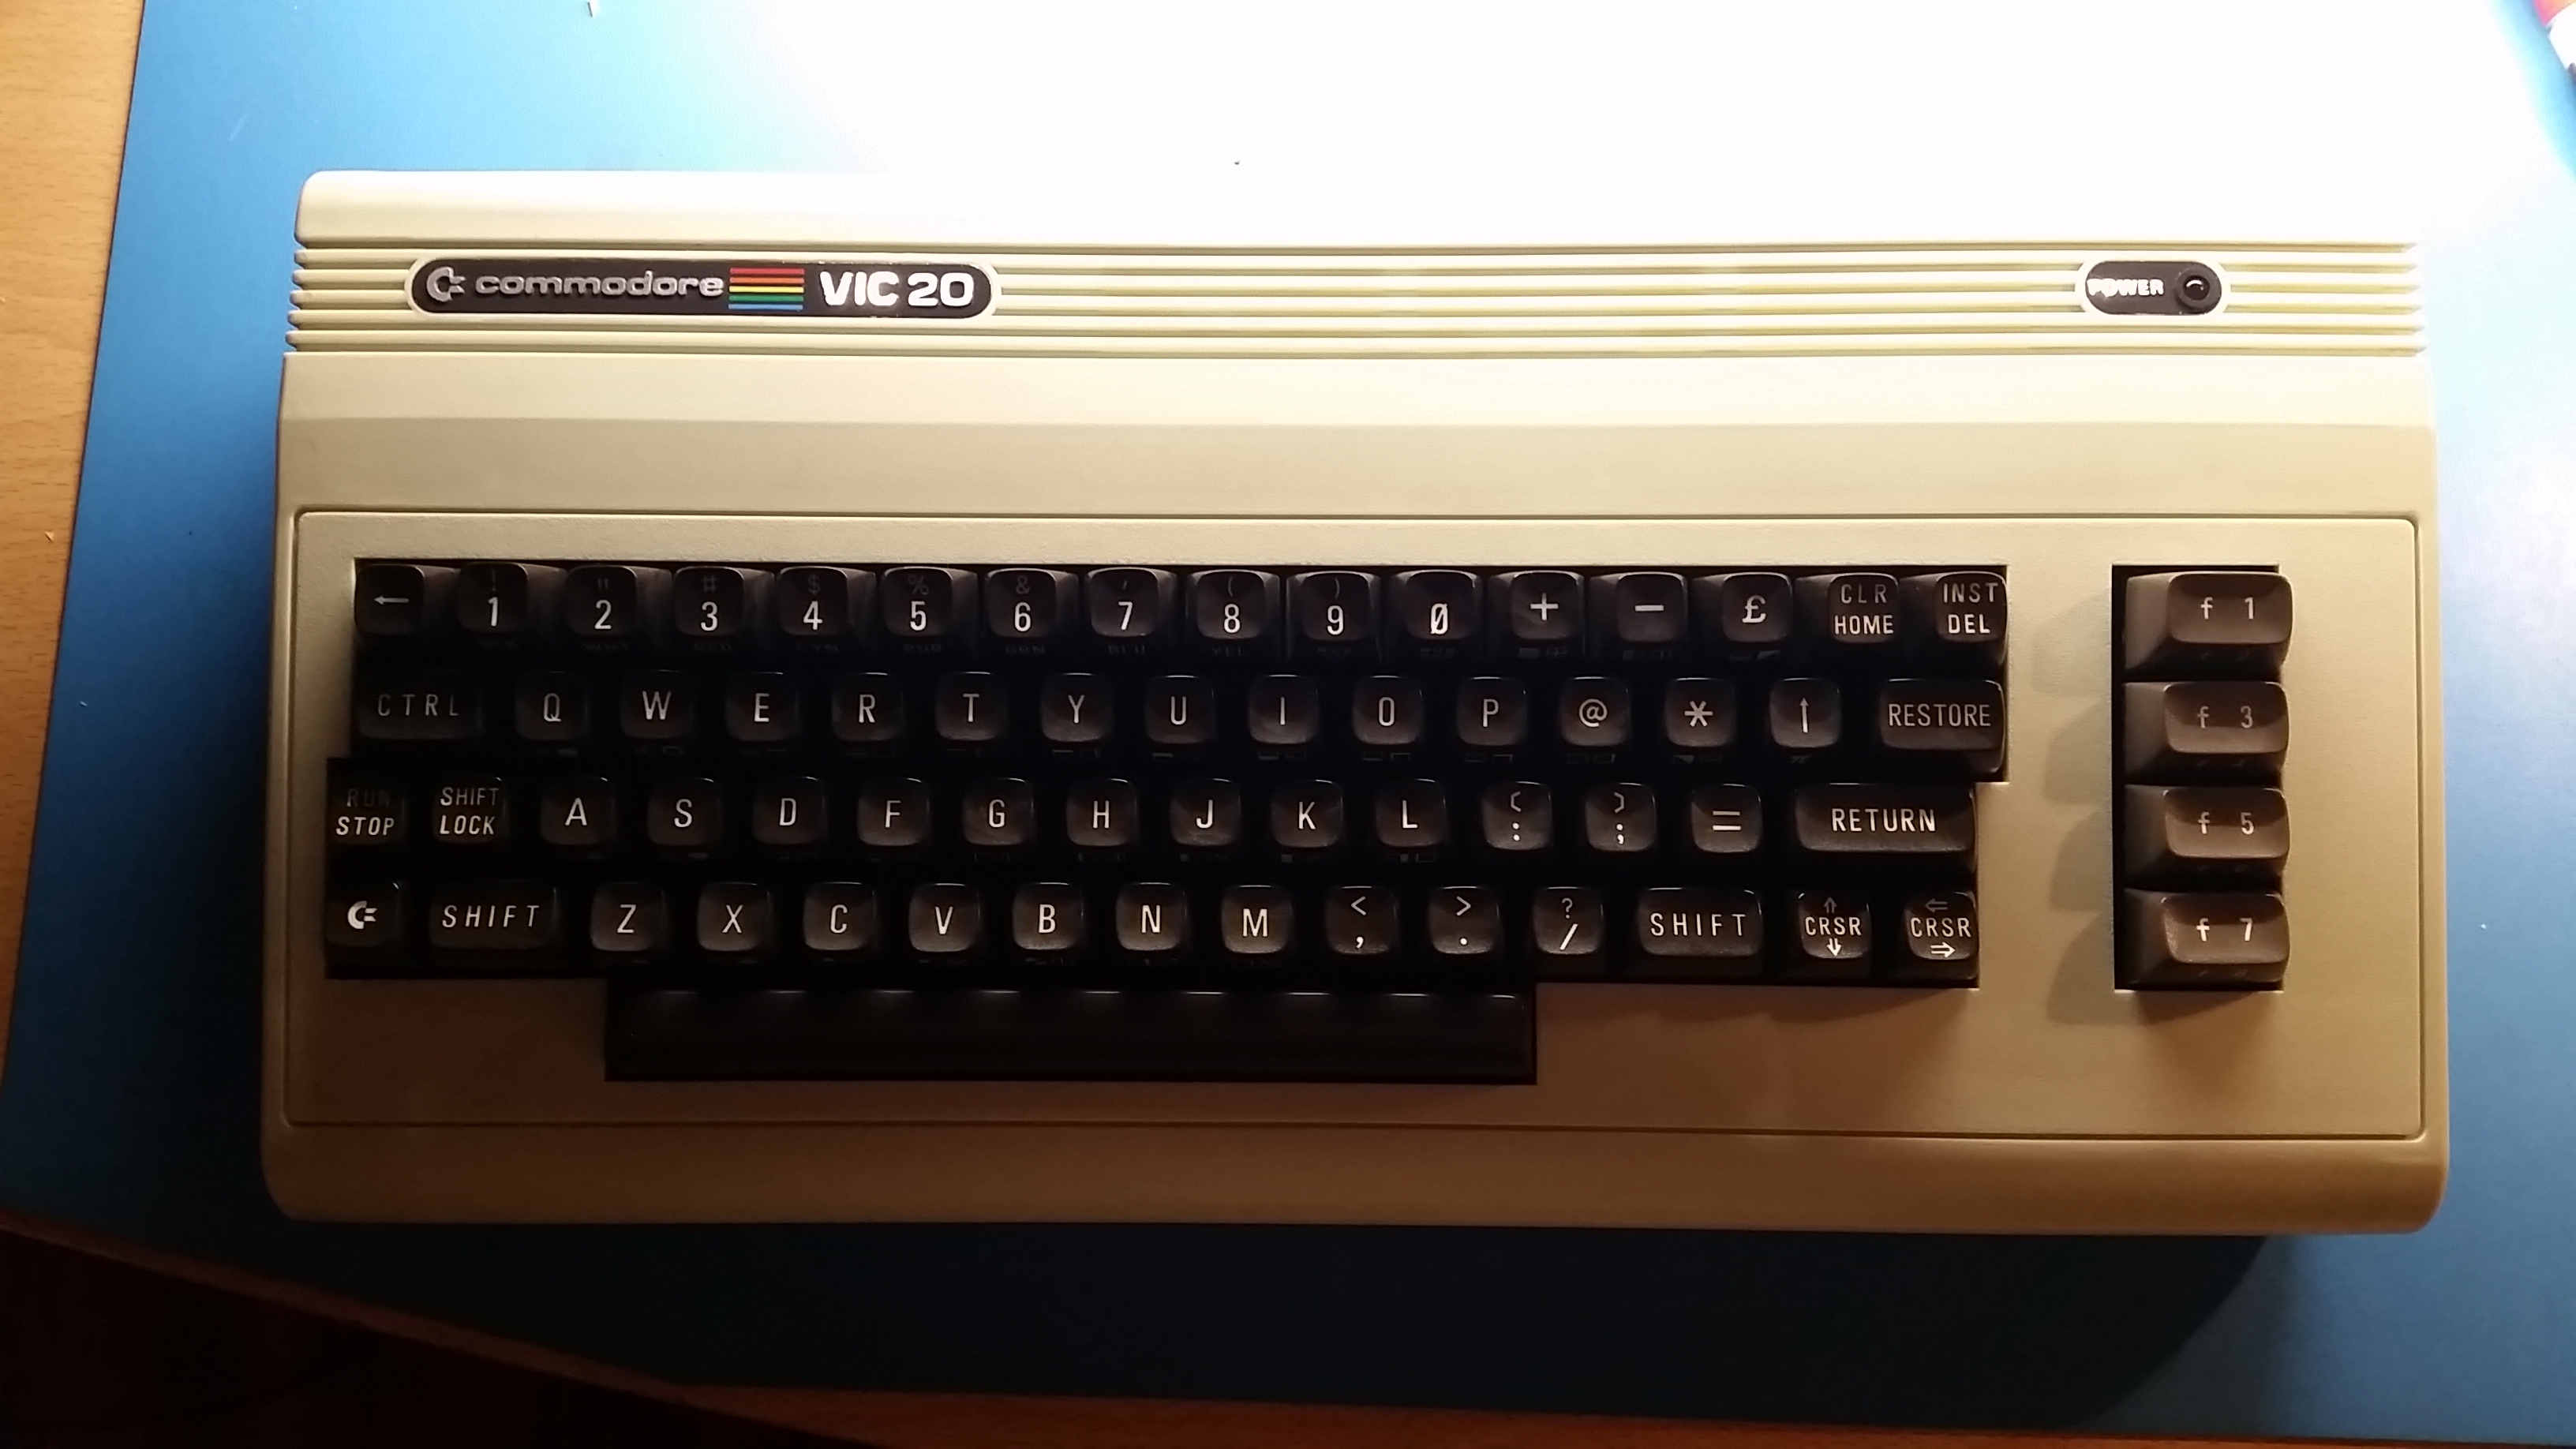
Fig.18: The final result, the VIC20 back to its pristine beauty
Conclusion
In this page, I described the restoration of a Commodore VIC20 that my family bought in 1985. I described the disassembly, the cleaning, the repair of the ABS case and also the variant of the Retr0bright process I employed. I then described the modifications I did to obtain a S-Video output, how I cleaned the keyboard and the reassembly of the machine.
My very first computer is become young again. The Retr0brighting process will be long lasting? Probably not, Internet contains reports of lot of people saying that it only last a few years and the yellow colour will appear again. This result is to savour only for a limited time? Maybe, but I am still very happy about it.
Bibliography
[1] - http://www.vintagecomputing.com/index.php/archives/189
[2] - http://www.vcfed.org/forum/showthread.php?12566-Removing-yellowing-from-plastics-Part-2
[3] - https://www.reddit.com/r/gamecollecting/comments/4pdwhw/my_theory_on_retr0bright/
[4] - for example here: https://www.forum64.de/index.php?thread/19241-meine-versuche-mit-wasserstoffperoxyd/&s=19a0ecbc66a7e8b86e92c5d133580814c1aa0a8b
[5] - http://www.classic-computers.org.nz/blog/2009-02-12-de-yellowing%20recipe.htm
[6] - http://www.classic-computers.org.nz/blog/2013-01-15-retr0bright-only-temporary.htm
[7] - http://www.amibay.com/showthread.php?62882-A-Retrobrite-and-Plastikote-Experiment-(Amiga-4000)&p=708760&viewfull=1#post708760
[8] - https://twitter.com/damianpeckett/status/878814026205089792
[9] - http://sleepingelephant.com/denial/wiki/index.php?title=S-Video_output
Log
July 16, 2017: first version of the page, in French and Italian.
July 31, 2017: Correct an error in the Italian translation ("cromo" instead of "bromo").
August 2, 2017: Correct a typo in the Italian translation ("consiglio" instead of "sconsiglio"). Finished the English translation.
License

This work is licensed under a CC BY, NC 4.0 licence.